
New to the adventure bike scene, Tim Harrison found that he wasn’t quite as comfortable as he ought to be in the saddle; so he dabbled in the dark art of farkling.
Having passed my test in 2013, my first ‘big bike’ was a Honda CB500X and as soon as I got it home I started to kit it out with all the extras like crash bars, fog lights, panniers, top box; you name it, I had or wanted it. After a year of riding my done-up adventure machine I started to get pains in my knees and wrists, even on the shortest of rides (I somehow managed to get leg cramps so bad that I couldn’t use the brake!) and so I came to the conclusion that the bike was too small for my 6’2” frame.
I swapped the CB500X for my current Honda XL700A Transalp which I knew would give me a bit more power, height, width and style. I decided that this time I wasn’t going to fit any old ‘adventure’ attachments to my bike until I was comfortable riding it, and so I set off on the journey to create the perfect adventure bike set-up. The process began with the basics; the pegs, seat, handlebars, gear levers etc. until I eventually found the perfect riding position for me.
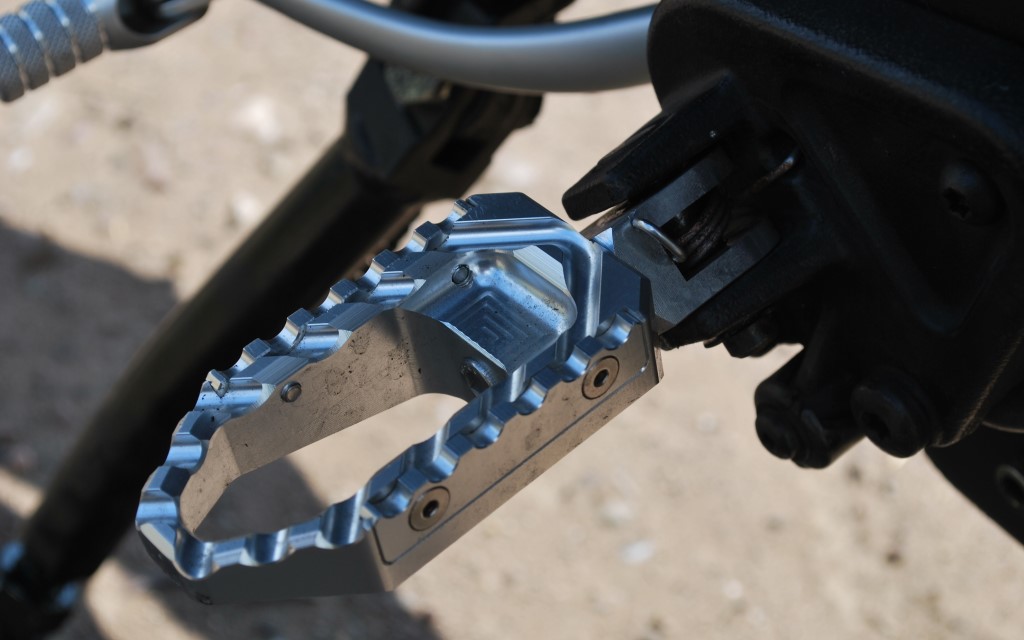
Project 1: The Pegs
Regardless of what you ride, I believe that the road to a perfect set-up starts at the footpegs. Stock pegs may be OK in terms of position but they don’t really support you for all eventualities you might find yourself in being an adventure bike rider. Touring pegs offer a wider footprint for added comfort and pivot pegs, which I eventually opted for, give better control and grip when off-road, especially when standing up.
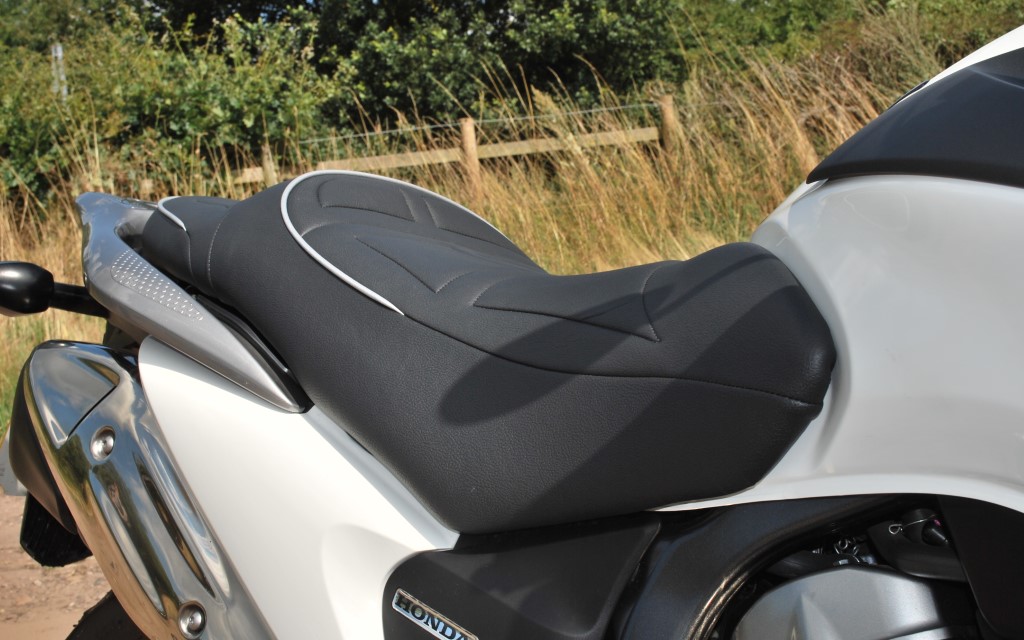
Project 2: The Seat
Next to tackle was the seat. After looking around the market I began to notice products like gel seats, gel pads, sheepskin covers and air pads. Everyone I’d spoken to had told me that they’d definitely help get a few more miles in before my arse cheeks became numb. I needed to raise my seat 50mm to get the best position for me, reducing the bend in my hips/knees and to stop me from having to lean forward. The only option I had was to get my seat customised so I added an extra layer of foam to my stock seat and to help avoid ‘numb-bum syndrome’ I had gel inserts put in from CM Seats in Coventry.
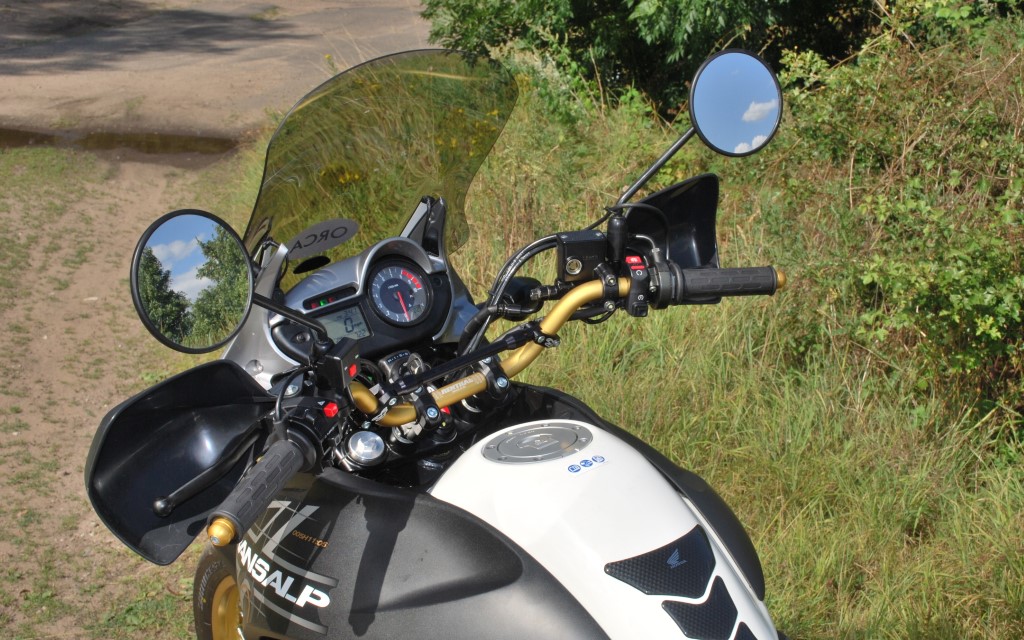
Project 3: Bars, Controls and Mirrors
After sorting out the seat and the pegs I turned my attention to the handlebars, controls, mirrors and grips. Just a minor adjustment backwards or forwards on the bars with adjustments to brake and clutch levers can help avoid pains in the wrists, waist, arms, shoulders and neck. I wanted my handlebars to be perfect for when I was stood on the pegs as well, and this was quite tricky to achieve. I raised my handlebars by 20/25mm but it wasn’t quite enough to make it comfortable to grip when standing without leaning forwards. Any more height would mean I was going to have to replace the brake and clutch cables so I added a 20mm riser and replaced the stock Transalp bars with Renthal High Bars.
After the bars had been positioned perfectly I worked through setting up the controls one at a time until they were spot on – I spent a couple of weeks riding both sitting and standing, making tiny adjustments to the positions until I got the best spot for me. In this time I also made sure I installed heated grips. Lastly, don’t forget the mirrors! My mirrors were positioned a little too low down and I didn’t realise until a friend who was following me one day told me that I kept snaking across the road as I looked down to use them, a cheap and easy fix is to use some cheap mirror risers.
Project 4: Screen
I don’t like being battered by the wind when riding, it tires me out and is actually one of the reasons why I chose an adventure bike over a naked bike. I made the mistake on my previous bike of thinking that the tallest screen on the market was the best for my needs, I was wrong! I was off-roading, hit a pothole and lurched forwards only to be smacked in the chin by my new screen! For this reason I decided that the best solution was a medium height screen (a GIVI D313S) with an adjustable bracket so that I could change it to suit my riding needs.
Project 5: Side-Stand
With all the changes I made to my bike’s height I had to make sure that it would lean right when on the side-stand. Manufacturers make lowering kits for the bikes but not for the side stands, so the only way to make sure it leant right, loaded up or not, was to fabricate one by using some threaded bar to allow adjustments in an instant.
Do you have your head in the shed?
If you’ve got a DIY bike project to share, email details to bryn@adventurebikerider.com with a few pics of your handiwork, and if it’s featured we’ll send you some stickers for your pimped up steed.