LOCATION, LOCATION, LOCATION
C’mon, admit it. You’re lost. Your map’s not up to the job and the satnav’s gasped its last. Fear not! Our bearded bushcraft expert John Fenna can read the stars, you know…
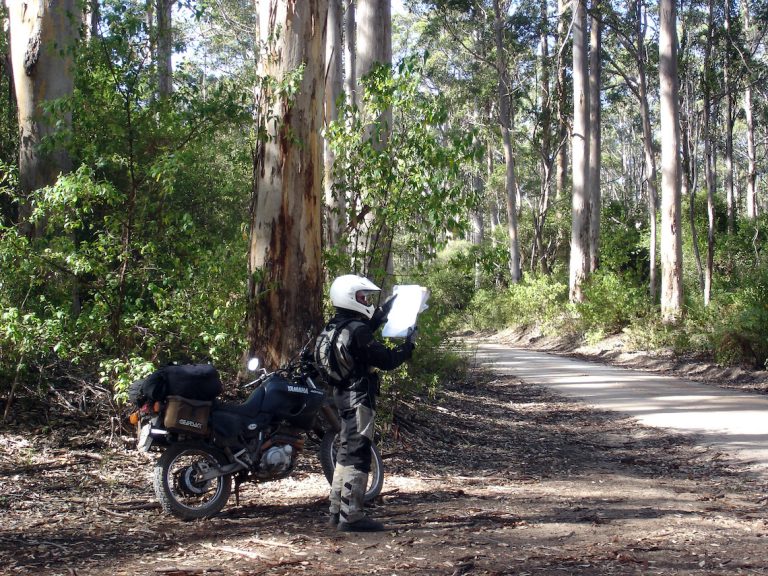
In terms of survival priorities, ‘location’ covers a fair few topics from knowing where you are and locating resources, to marking your position to attract help. You can also use markers like a breadcrumb trail, to help rescuers find you if you have to move away from the initial site where your ride went wrong.
If you’re going into remote areas you need to carry the most detailed maps you can get hold of, and a suitable compass. The maps in many parts of the world are still rather vague, or hard to find. In some places the authorities view map-ownership as akin to planning armed revolution! For detailed navigation with a compass you will also need to know the local magnetic variation (the difference between true north and magnetic north – a moving point) which can sometimes be difficult to ascertain. Local magnetic anomalies, caused by iron deposits and the like, can really upset things if you’re not wise to them. GPS units can overcome this problem, but as with all electronic items, they can also break, run out of power, or get lost…
What’s the point?
Simple directional information needs a basic orientation. This can be gleaned from a rudimentary compass, or even improvised navigational aids and natural indicators. Just knowing the general direction of north can help in many situations. If you can suss out north, then a map that indicates a source of water, shelter, or rescue up a valley running north-east from your position is a lot more useful. It will also mean you can avoid areas marked unsuitable for bikes, too.
Help from above
If your situation means that you want to attract help to your location, then you need to advertise your position as best you can. In open areas, where the most effective searches will be conducted from the air, then it makes sense to arrange signals which can be clearly seen from above.
Bikes on their sides give a bigger visual target than those on their stands and show that help is needed; rising smoke from a fire will indicate that you’re close by and alive. If they’re not needed for shelter, survival bags and blankets can be laid out on the ground or tied to trees to flutter as flags to attract attention. You can also build distress signals using rocks and contrasting vegetation, or dig an ‘SOS’ into the ground. Make it as large as possible to catch the eye of a rescuer.
Anomalies which are out of sort with the surrounding environment will stand out immediately to a search team. For example…
Shape: square shapes are unusual in nature and the outline of your bike on its side would be recognisable
Shine: use your survival blanket and chromed or polished bits of your bike to flash sun reflections in all directions. Your survival signal mirror can be aimed to shine at any potential rescuers to indicate your location
Shadow: a big SOS sign – built up or dug into the ground – will throw a shadow even more visible than the sign itself
Silhouette: a sign set on a ridge, such as a large cross or a fluttering flag, can stand out in silhouette against the sky; one that set too low will just fade into the background
Colour: day-glo colours stand out well against most backgrounds and attract attention. At night, an orange survival bag illuminated from inside by a torch stands out as a big orange blob – far more visible than a narrow torch beam
Movement: a moving object will always attract the eye more than a stationary one. If you can, set up signal flags and, if you see potential rescuers, wave your arms and flags to attract their attention. At night, strobes are more visible than steady lights and many torches now have a strobe setting for this reason
Contrast: dark signs show up on light backgrounds and vice versa. A silver survival blanket makes a poor signal on a snowslope, but is great against an area of burnt ground. Equally, white smoke from wet/green vegetation stands out against dark vegetation, while black smoke from burning tyres and oil is more visible against snow and dried-out grasslands
Sound: Even if you don’t have an emergency whistle, shouting and banging bits of metal together will attract attention
Which way?
If you’re forced to move your location, to find shelter, water or food, or even to try and find safety, then it’s wise to mark which way you’ve gone rather than expecting rescuers to find you. This means anyone looking for you will find you faster once they come across your initial location.

Ideally you need to leave written information about yourself. Write down why you’re moving and where to. You should also include a description of your physical condition; the colour of clothing and equipment you’re wearing; the direction in which you’re going and reason for leaving where you were. For example: Group of four; one with badly broken arm, headed south-east down the valley trying to find drinking water. Date: Friday 13 January, 2012. Clothing: black and red motorcycle gear with orange survival bags. All have torches and whistles. Add any other information you might think useful to anyone searching and put the message in an obvious position.
Mark the way you have gone as clearly as you can by breaking branches on trees or cutting slabs off the tree bark so that the marks can be seen from both sides (you may wish to find your way back!). You could also build cairns of stones in rows, or make arrow head pointers out of rocks or sticks, all as visible as possible, or tie rags of clothing onto bushes.
Your initial markers should be well visible from the air and, on the ground, each marker should be visible from the next.
DIY directional aids
If you lose or break your compass, there are several ways to establish a rough idea of where north and south lie…
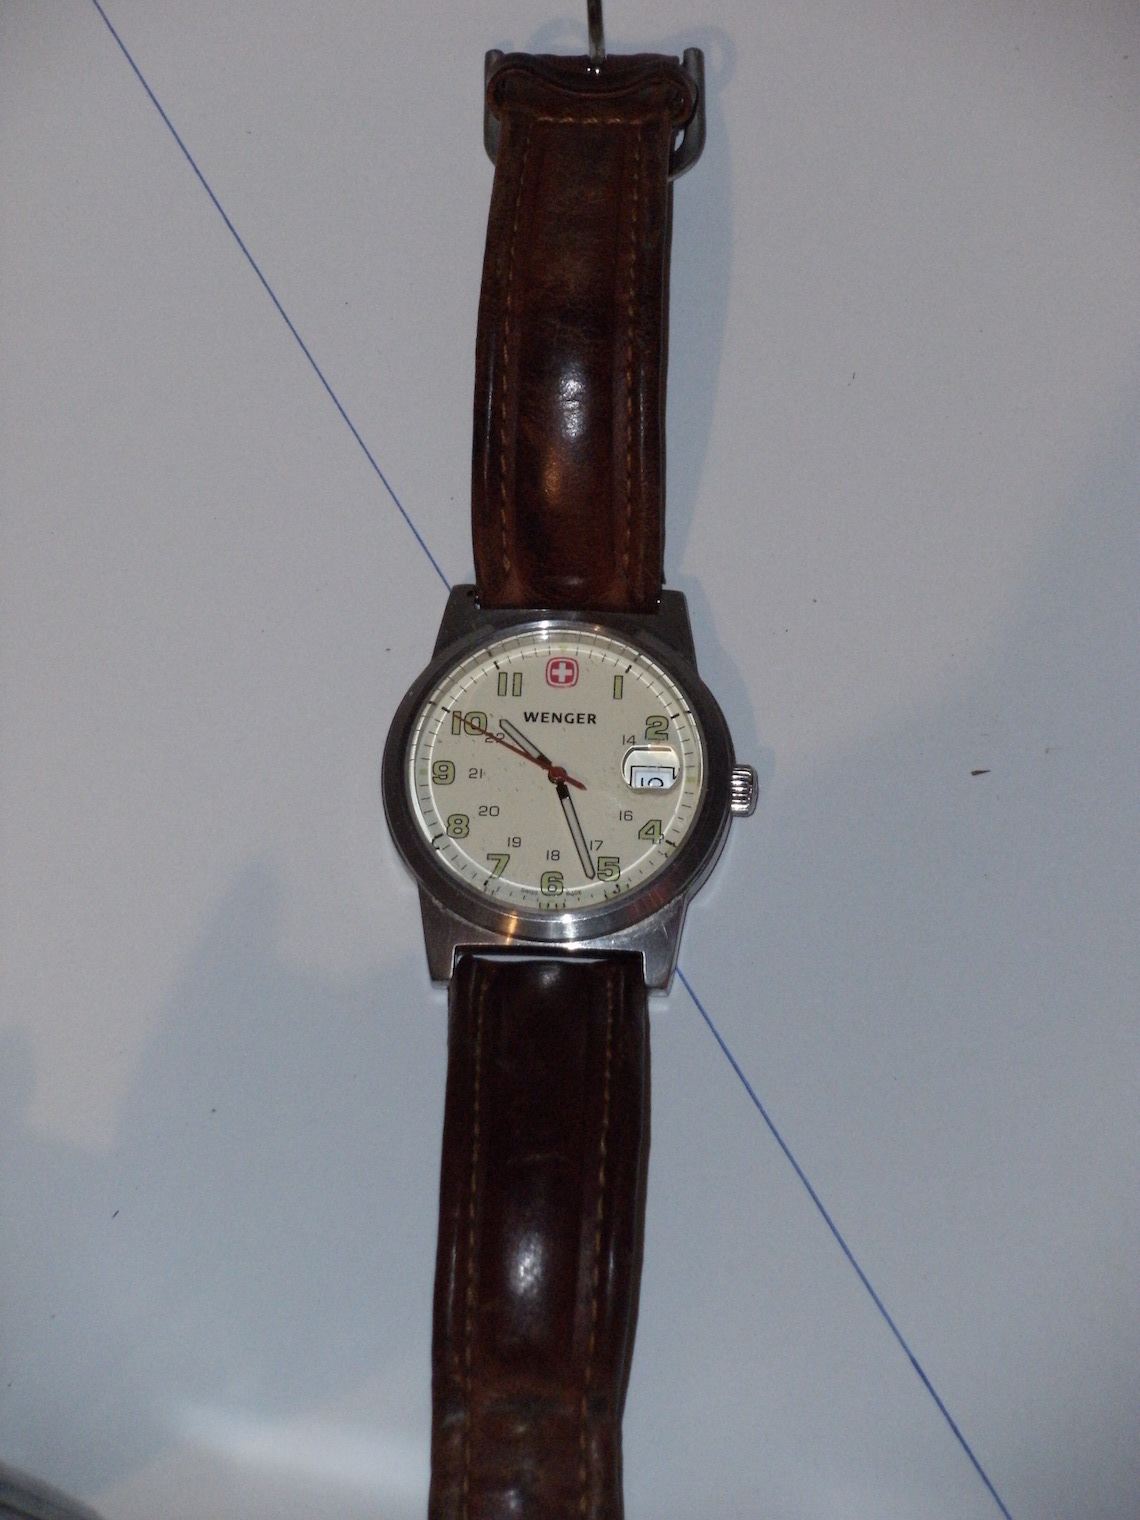
Using an analogue watch set to true time (not ‘summer time’ or similar), point the hour hand at the sun and bisect the angle between the hour hand and ‘12’ with an imaginary line. If you’re travelling in the northern hemisphere, this line will be roughly north-south with the south end of the line being the closest to the sun. In the southern hemisphere, point ‘12’ at the sun and bisect the angle to get your north-south line; north is nearest the sun. If you don’t have an analogue watch, draw a clock face on paper taking the time from a digital watch.

On a night with a crescent moon showing, you can get a rough indication of direction by projecting an imaginary line through the tips of both horns and down to the horizon. This point is roughly south in the northern hemisphere and north in the southern hemisphere.
On a sunny day, push a long stick vertically into the ground. Mark where the end of the shadow falls with a rock. Wait some time (the longer the better, though half an hour will do) and mark the new position of the end of the shadow with another rock. Draw a line joining the rocks. This line points east-west. Your north-south line is at 90 degrees to the line you have just drawn, with south being nearest the sun in the northern hemisphere and north nearest the sun in the southern hemisphere.
Distress signals
How to be heard and understood wherever you are
The most commonly recognised distress signal around the world is SOS. This can be drawn onto the ground with rocks, vegetation, shadows, walls or dug into the ground itself. SOS can also be signalled in Mores Code by flashing a torch or headlights, or blowing a whistle. The Morse for SOS is dot-dot-dot, dash-dash-dash, dot-dot-dot. Dots are short flashes of light or blasts of sound and the dashes long flashes or blasts. To ensure your message is received and understood, separate sound signals by one minute of silence and light signals by one minute of darkness .
A big ‘X’ on the ground indicates your position to aircraft and that you cannot move; a single bar ‘I’ indicates a seriously injured person. Signs need to be as big is possible – aim for around 30mx3m.
Three fires in a triangular pattern is an internationally recognised distress signal, but don’t light them until you hear a search plane unless fuel is readily available. If fuel is in really short supply then one fire is better than none.
Groups of three signals – fires, gun- shots, etc – tend to be recognised as distress signals.
Keep fires under control – getting fried in a wild fire is no way to get rescued and when practising any of these techniques be sure that you don’t set off any genuine rescue call-outs.