You’ve made the decision that riding with numb, painful hands isn’t how you want to do things anymore so you’ve gone out and bought a pair of heated grips. It’s now time to fit them. While some instructions say that you need a qualified person to fit them, it’s not a difficult job and, as long as you are willing to have a go, you will realise that they can be fitted in no time at all.
The first job is to make sure the grips you have just purchased actually work and are not faulty. You don’t want to go through the process of fitting them only to find out that they do not work and you have to take them back off!
Step 1: Make sure the heated grips work
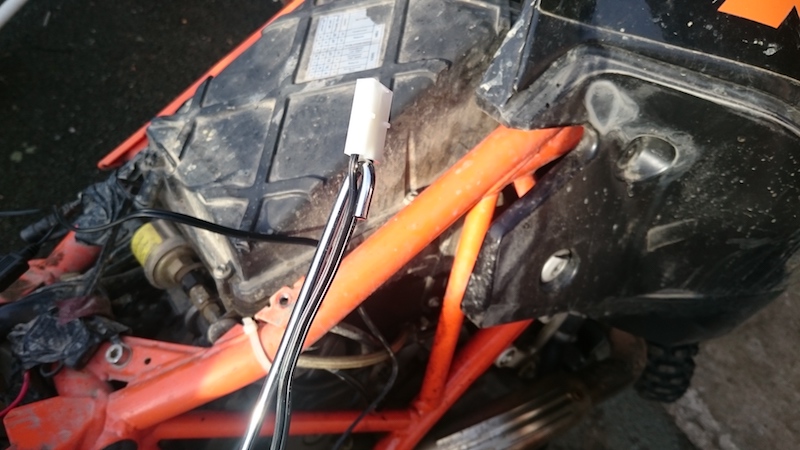
To test them, simply connect the ring terminals (assuming they come with ring connectors) to your battery, and connect the new grips to any connector blocks, attaching the temperature controller as well. You don’t need to route any wire or fit the grips to do this test. Now turn the controller on and make sure the grips get warm. If they don’t, then check all the wiring. Turn the ignition and start your bike. Try the grips again. If they don’t work then it’s possible they are faulty.
Step 2: Remove existing grips
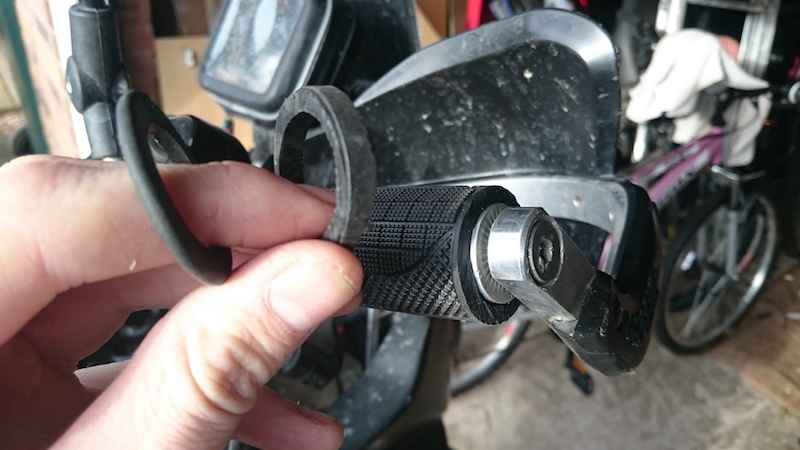
Glued grips will need to be worked loose with an implement
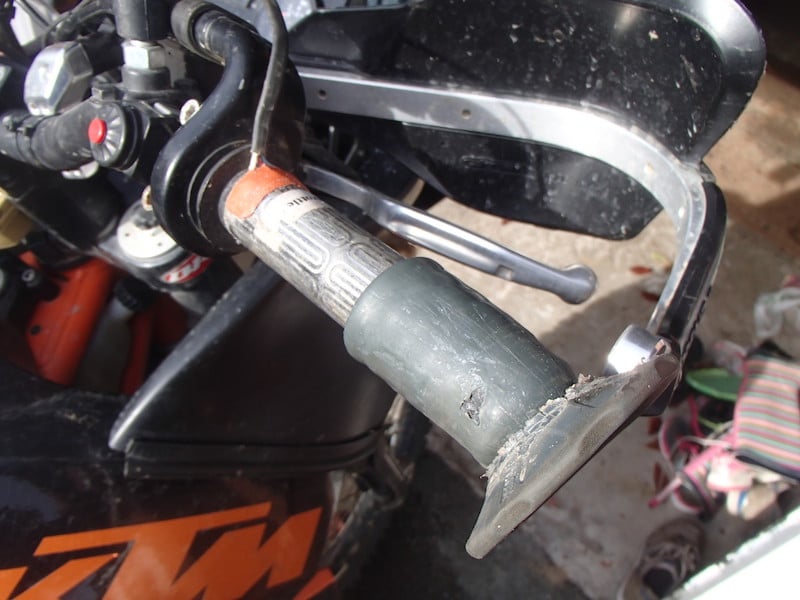
After working lose, peel them off
If they won’t peel off, show ’em the knife. If you are replacing heated grips, ensure that they’re disconnected before starting this
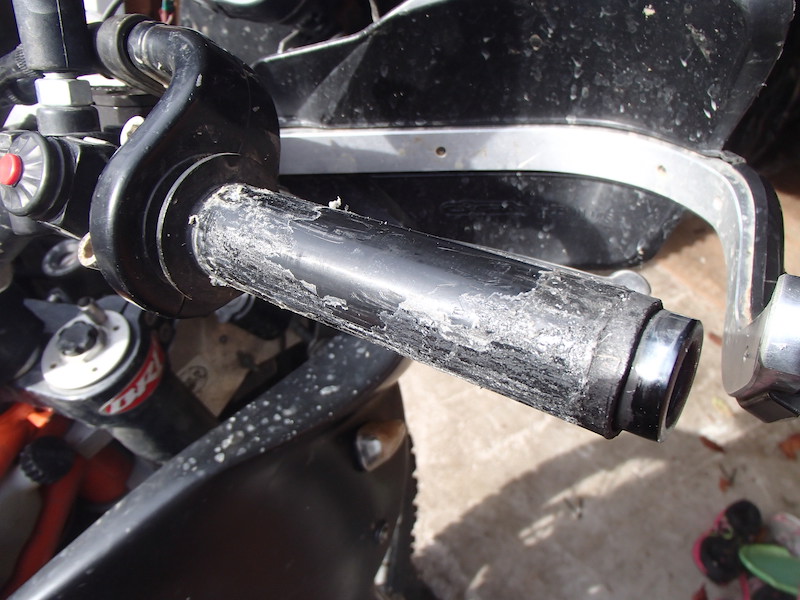
Once removed, clean off any remaining glue residue
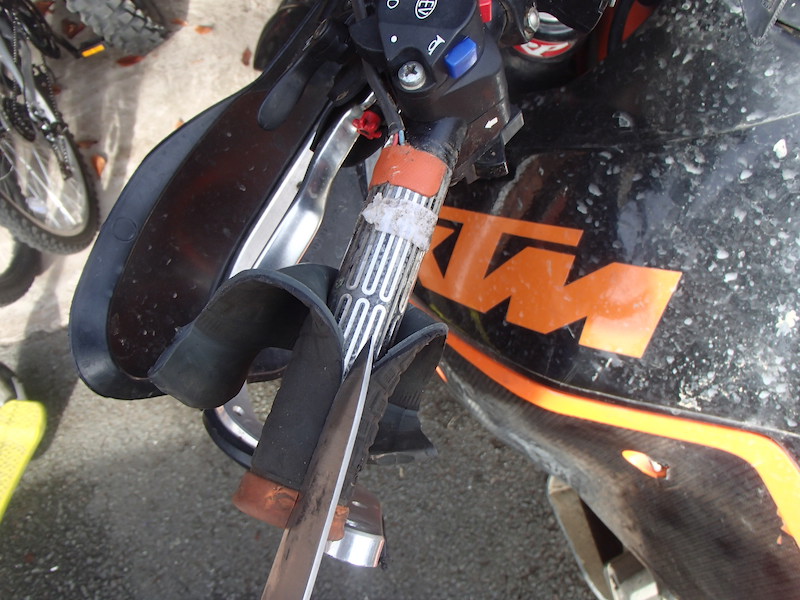
If they work, it’s now time to remove your existing grips, whether these are heated or not. First, you may have to remove and handguards or bar ends. Once off you can get to the grips. The chances are most grips will have been glued on, therefore removing may require cutting (if you’re removing old heated grips, make sure that you have removed any connectors to the battery before starting).
Take it steady, try to twist and turn to see if the grip comes loose. If not, carefully slide a blade between the bar and the grip to cut through any glue. Failing this, carefully cut the grips and remove. You will then need to remove any glue residue from both bars before fitting the new grips.
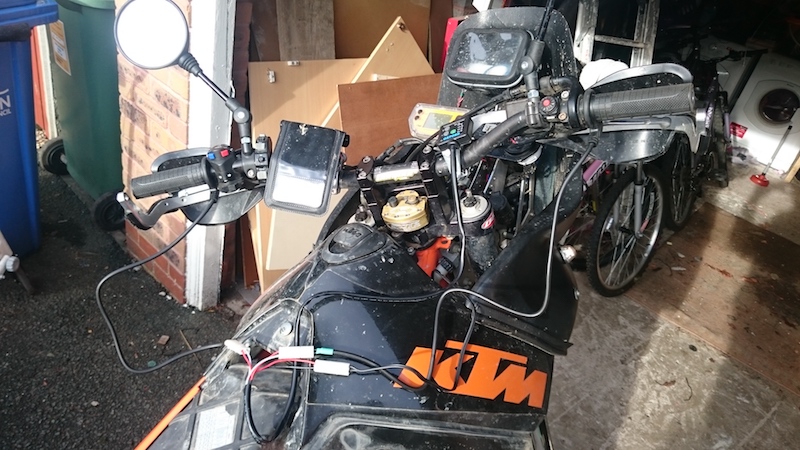
Step 3: Fitting the heated grips
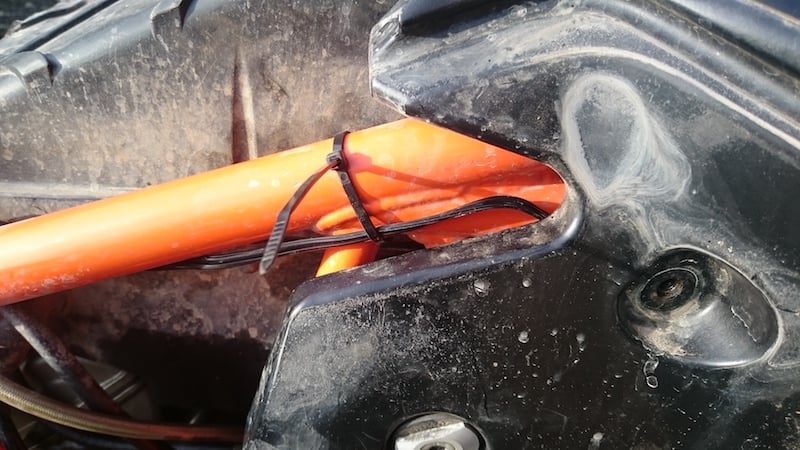
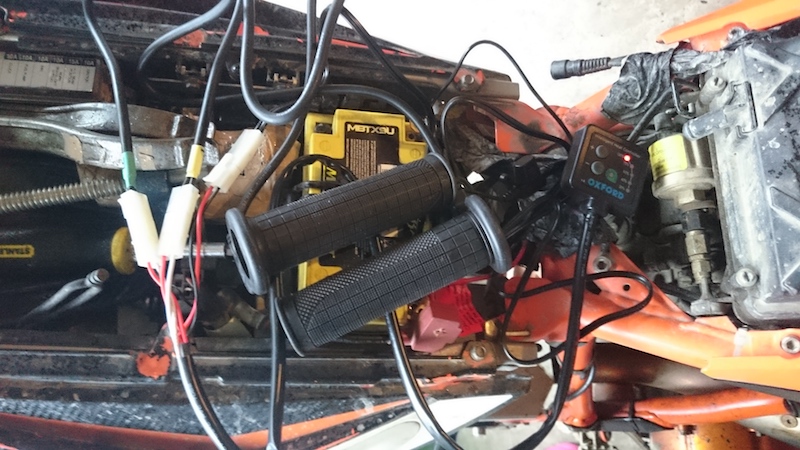
The final stage is to fit the newly purchased heated grips. The first step is to connect the wires to the battery and then route them through your frame towards the handlebars. You may need to remove panels, or possibly the tank in order to do this. Cable tie the wires to your frame to keep them in position.
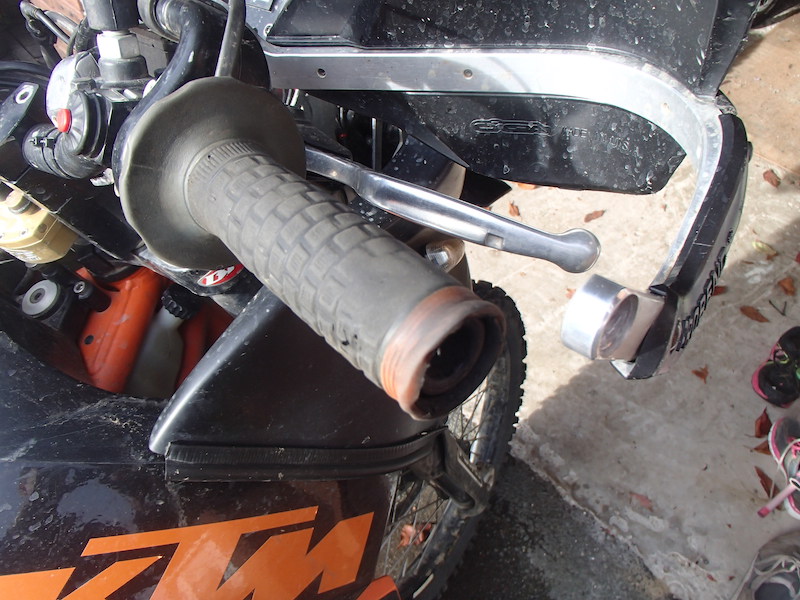
Step 4: Dry mount the grips
The next step is to ‘dry’ mount your grips. Make sure they are in the correct position, check the instructions if unsure. It’s important that the brake and clutch levers can both operate without the grips hindering movement.
Step 5: Trim to fit
They may need trimming at this stage, this is easily done with a sharp knife once in place. Make sure you don’t remove too much, or cut into the heated element, consult the instructions to see if there is an acceptable ‘cutting range’.
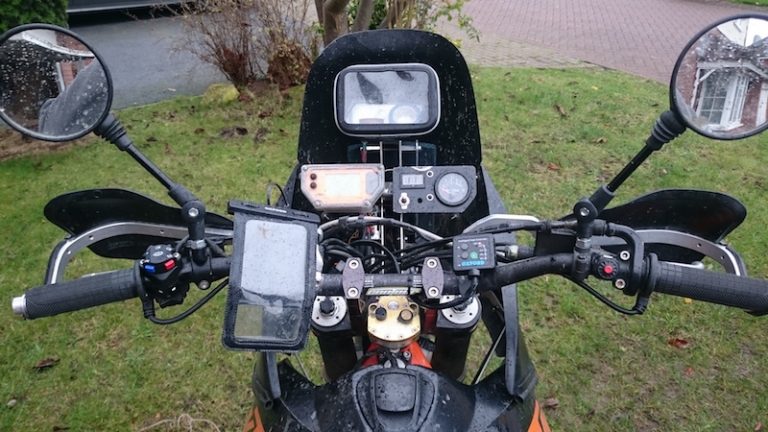
Step 6: Mounting the controller
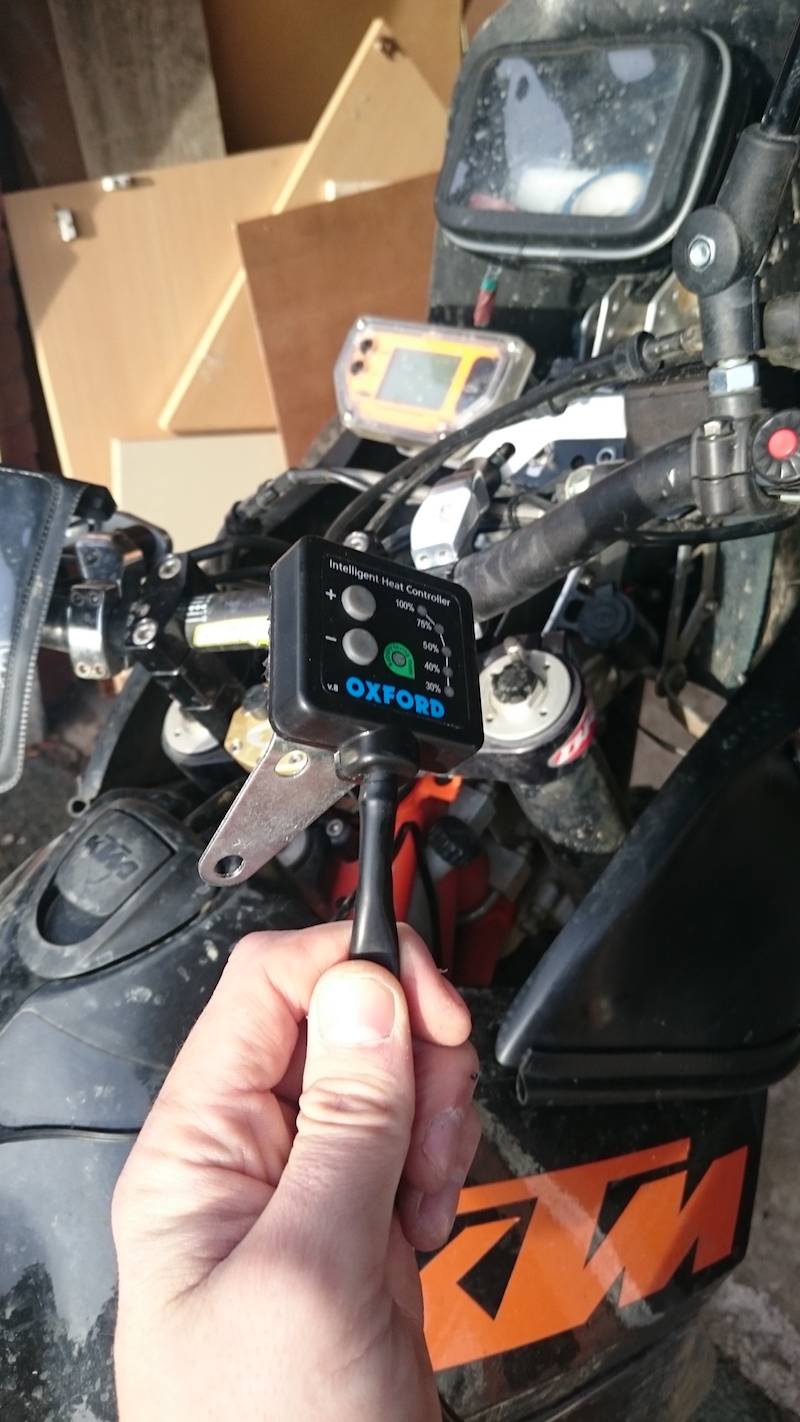
Next, mount the controller. Do not rush this part as it is important that you mount it in the best possible place on your bike.
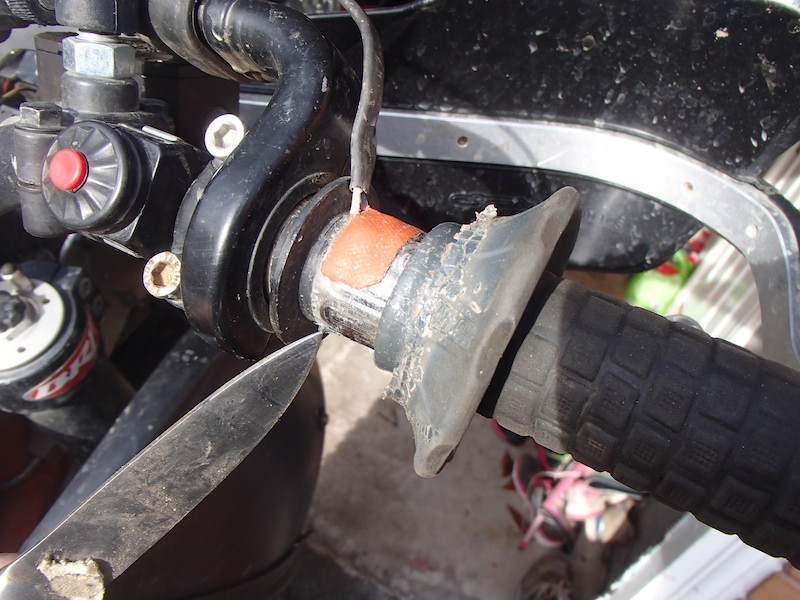
Step 7: Securing the grips in place
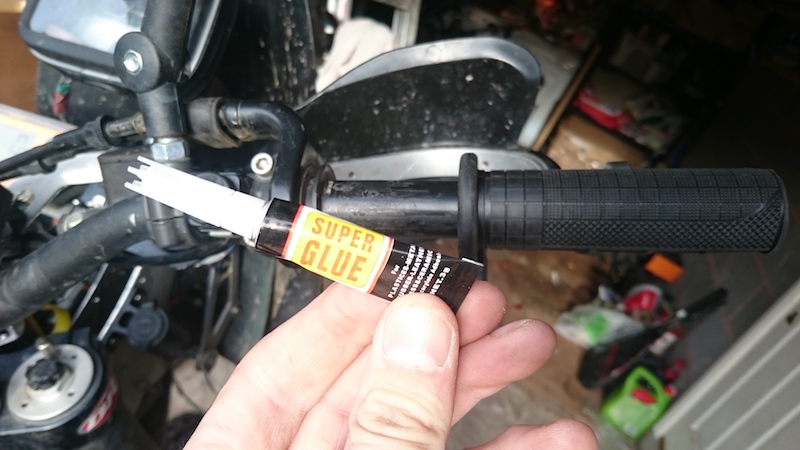
If you are happy with how everything is set up it’s now time to glue the grips in place. Work quickly and carefully as you don’t want to get glue everywhere or permanently fix in the wrong location. Remove the grips, apply the glue along and around the bars. Now slide the grips back into position.
Step 8: Tidying up the cables
You’ll want to keep your cables neat and tidy
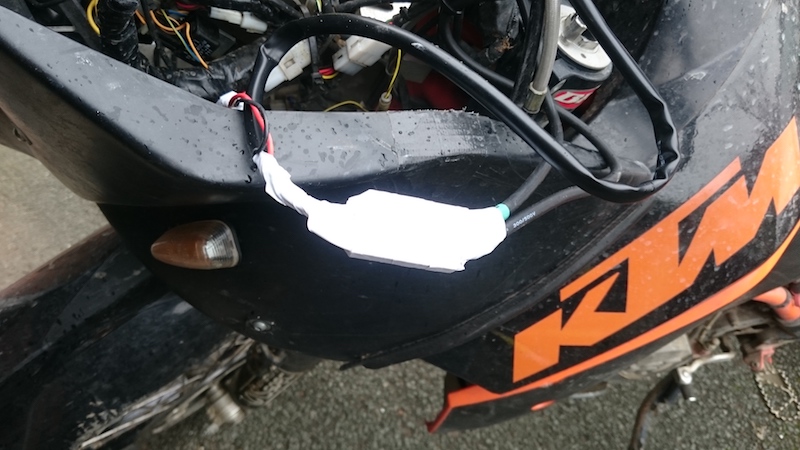
Electrical tape will keep them safe and neat
Finally you will be left with a lot of cables. After installing the Oxford Adventure grips I was left with three cables, one from each of the grips and one from the controller. I routed these along existing wiring, cable tying along the way. Pick a suitable place where you want all the extra wire to go and aim to get everything there as neatly as possible. Once all together apply electrical tape and create a neat bundle that can be tied out of the way.
Congratulations, you have just fitted heated grips to your bike that will really benefit you on the colder days. Heated grips aren’t the only things that can help make your ride more enjoyable when the temperature drops though, so you might want to check out our guide to keeping warm on your motorcycle.