
Are you planning an adventure on the Trans Euro Trail this year? ABR Bike Tester Julian Challis explains how to prepare for the journey.
In recent issues of ABR, I’ve written a series of articles documenting my travels along the UK leg of the Trans Euro Trail, better known as the TET. This sensational route stretches for more than 2,000 miles along the length and breadth of England and Wales, taking you down a myriad of green lanes and quieter roads in the process.
I’ve enjoyed some incredible TET adventures and I’d highly that recommend you explore the route yourself, either in part or in full, depending on how much time you have to spare.
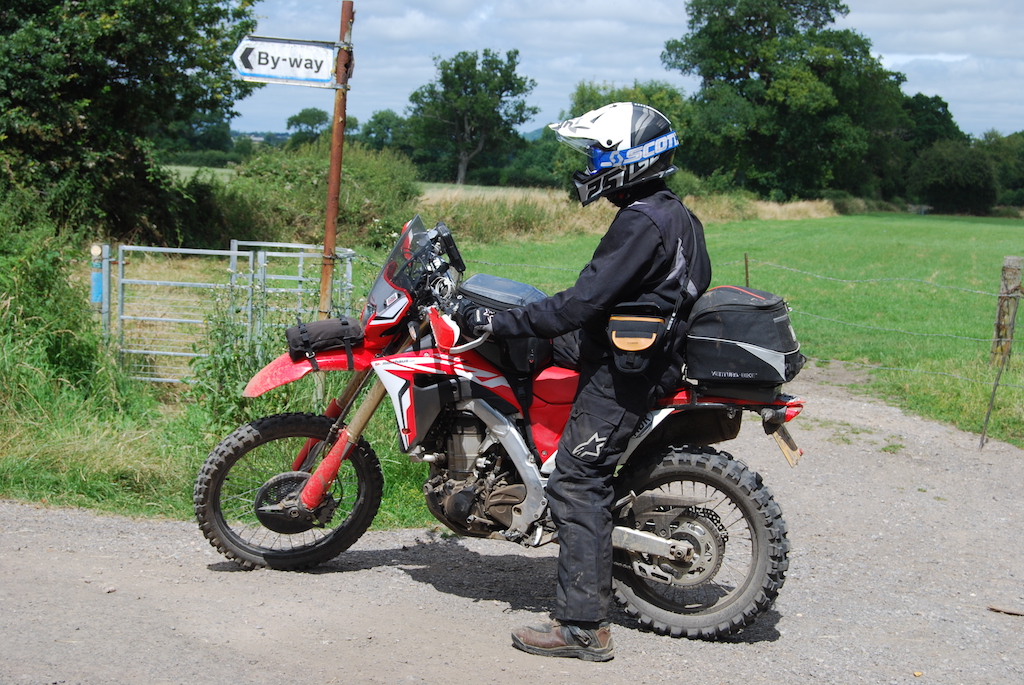
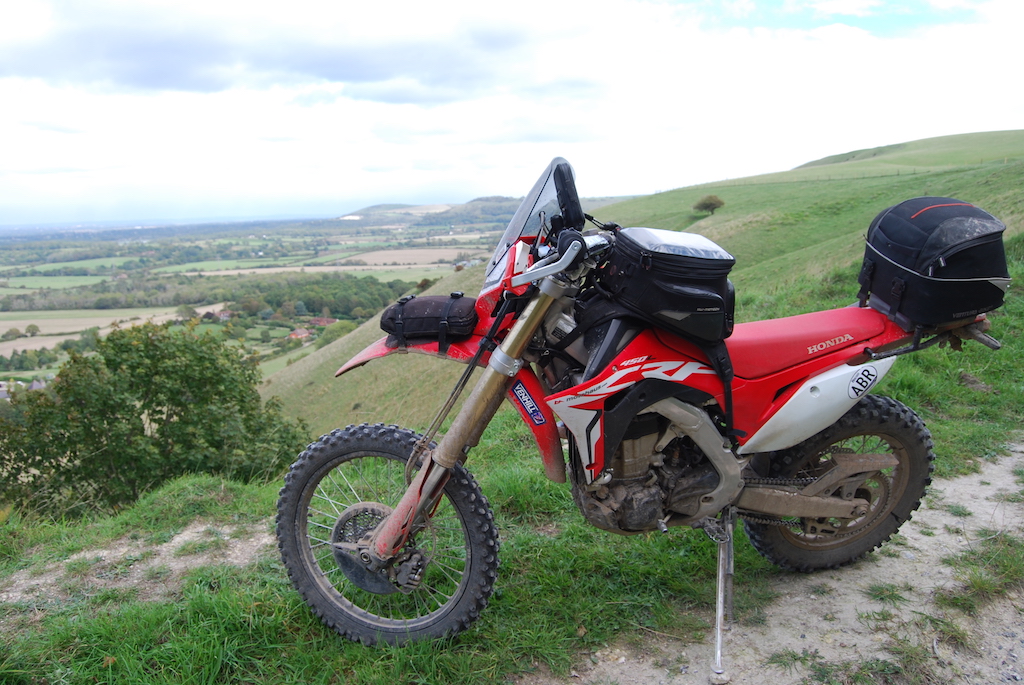
With this in mind, I thought it might prove useful to take a closer look at my ABR long-termer, the mighty Honda CRF450L. I literally rode from one corner of England to another on this bike, tackling the Great Western Trail section of the TET from Bristol, all the way to Land’s End, and again from the West Country to Dover.
Of course, it doesn’t really matter which bike you chose. From a Honda Cub all the way to a BMW GS Adventure, it’s all good, although a smaller bike will make the trickier sections more manageable. But if you are looking to take on a bit of this epic route in the UK, hopefully, the modifications and additions I made to the CRF450L will give you some pointers as to what you might want to consider for your trip.
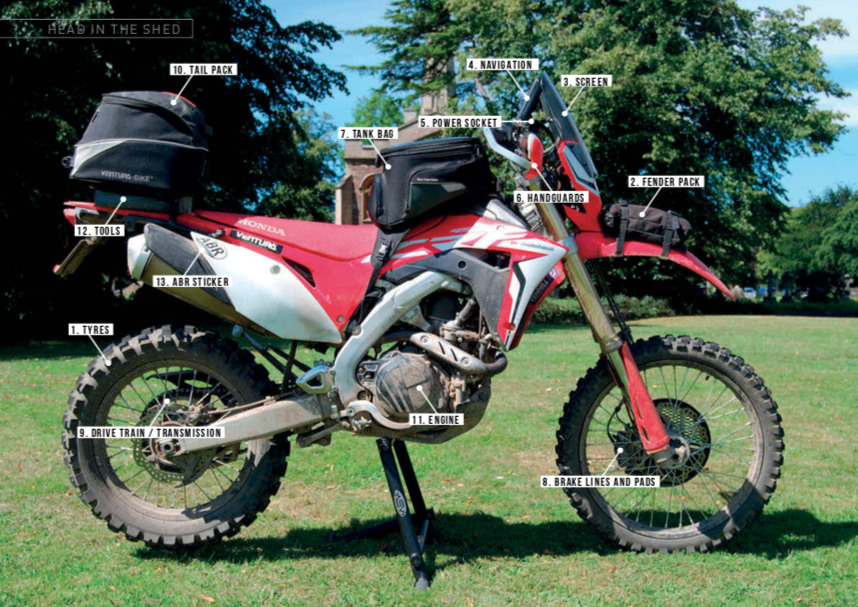
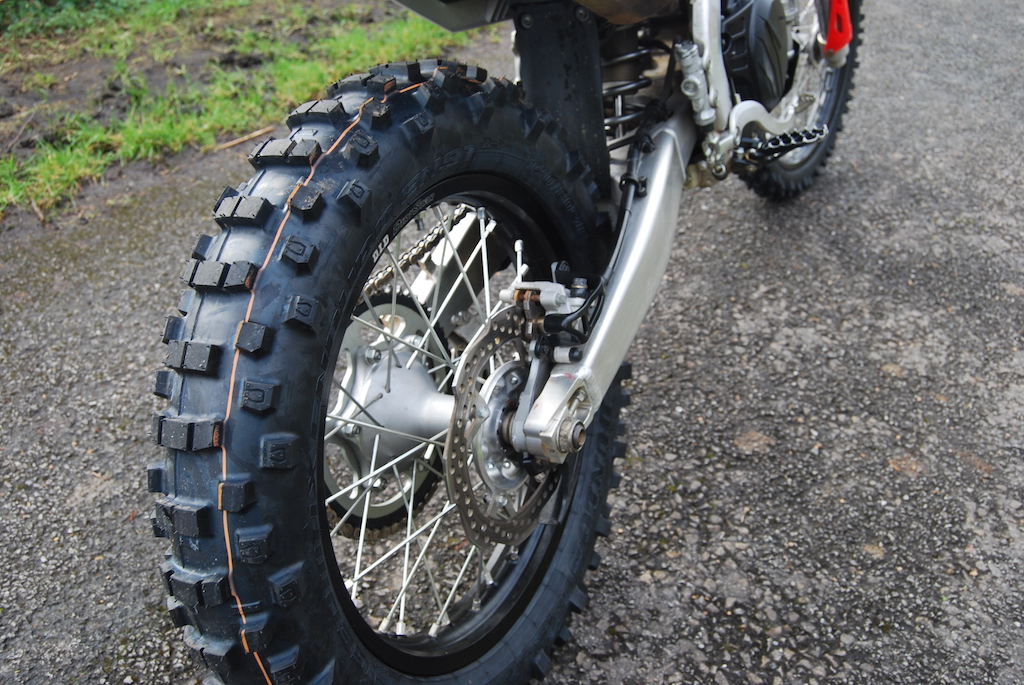
1. TYRES
Choosing the right rubber for your trip is pretty important, especially if the weather turns snotty. After trying different options, I would recommend going for full-on dirt tyres like the Dunlop Geomax.
Knobblies will give you great grip if the going gets tough away from the tarmac, but they also possess good manners for the road sections. Let’s face it, it’s unlikely going to be the blacktop that has you struggling for grip.
2. FENDER PACK
If you are running tubes in your hoops, then it’s best to take some spares. I use a fender pack as it avoids filling up your other bags, and it’s easy to access if you do need to break out the tyre levers. That said, running some Bike Seal in the tubes is a good precaution to avoid trailside repairs.
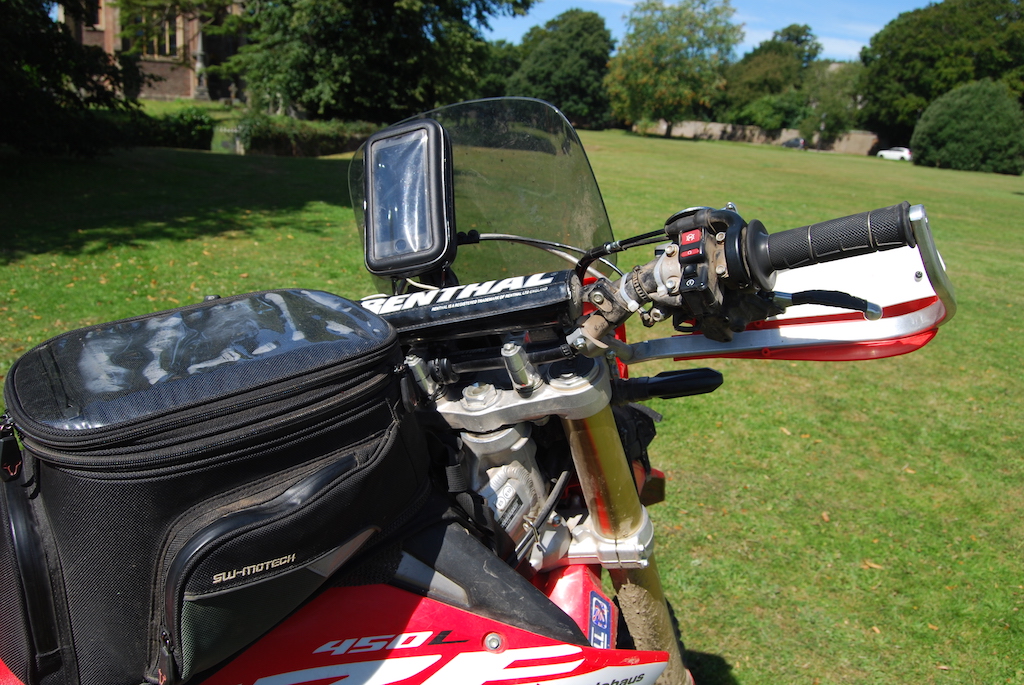
3. SCREEN
Most trail bikes, and some smaller adventure bikes, lack decent weather protection, so I had this small screen custom made by Skidmarx based in Weymouth. It is easily attached to the headlight mask with four plastic number plate screws and offers rain protection for the rider, the cockpit, and navigation equipment. And it looks trick too.
4. NAVIGATION
You’ll need to have the full TET route on some kind of navigation device or phone-based app for your ride. I used an iPhone, downloading the route via a laptop from the TET site to Viewranger and Bike GPX apps.
For a holder, I used a basic RAM mount on the handlebars, attached to a cheap waterproof phone holder that I sourced from eBay for less than £10. Although this is only a budget option, the holder isolates the phone from vibration that can easily wreck a smartphone.
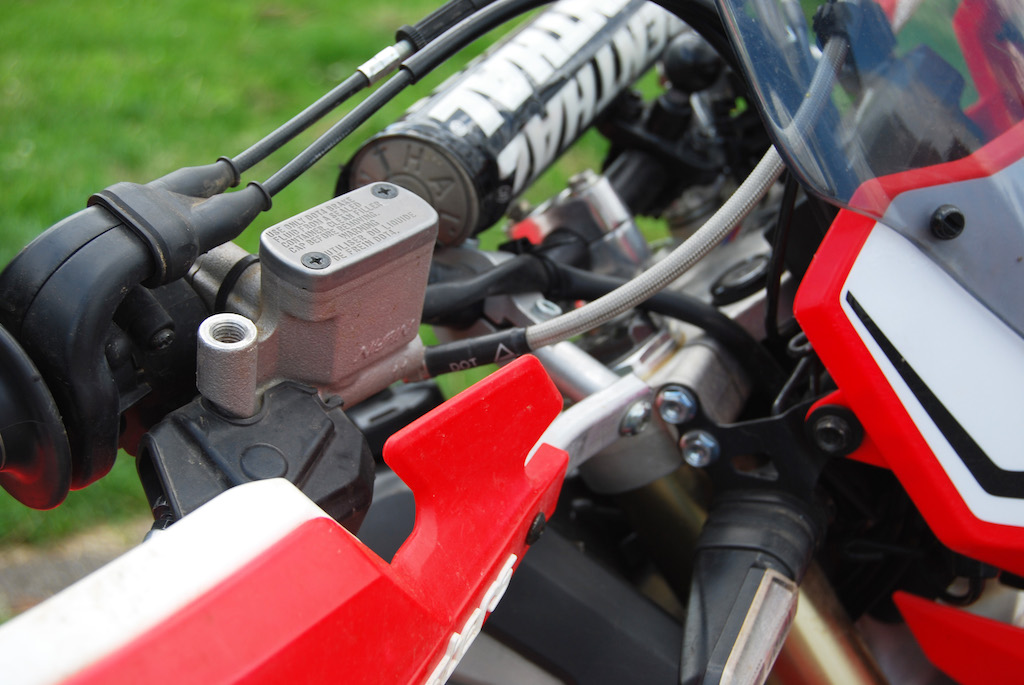
5. POWER SOCKET
If your bike doesn’t have one, then this is essential because navigation apps will drain power from your phone or other navigation devices at a worrying rate. I bought one on eBay for around a tenner, attached the socket to the bars, ran the wires alongside the radiator cowls, and wired it directly into the battery. It’s a fused unit and pulls a negligible current, so hardwiring into the loom seemed hardly worth the effort.
6. HANDGUARDS
OK, so if you are going to tackle the dirt sections of this fantastic route, then it’s just possible that you may fall off or drop your bike at some point. And if the first tumble breaks your levers, then it’s game over pretty quickly. I use wraparound guards and these Barkbusters are tougher than a woodpecker’s lips.
7. TANK BAG
Running a tank bag keeps all those essential items nice and safe in front of you and out of the way for water crossings. It’s also a great place to keep cameras and wallets, while you can fill the side pockets with cable ties, tape, chocolate bars, and other trail favourites.
Old school fans can even put an Ordnance Survey map in the top pocket on this SW Motech tank bag, and at the end of the night, the bag zips off the mounting harness. Genius.
8. BRAKE LINES AND PADS
With a mix of tarmac and trail to be tackled on the TET, I upgraded the stock Honda rubber hoses back and front to braided stainless steel lines from Venhill. And, if you are taking on a bigger trip, then it’s a good idea to start with fresh pads rather than running low on day two.
9. DRIVE TRAIN / TRANSMISSION
Just as you’re best to set out with fresh brake pads, then it is worth considering your motorcycle’s transmission. Don’t begin your trip with hooked sprockets and a knackered old chain, that’s a fool’s mission, believe me. I reached for the Renthal catalogue as a default option, and while you are there, fresh oil and filters are a very good idea, especially if you are on a high-revving trail bike.
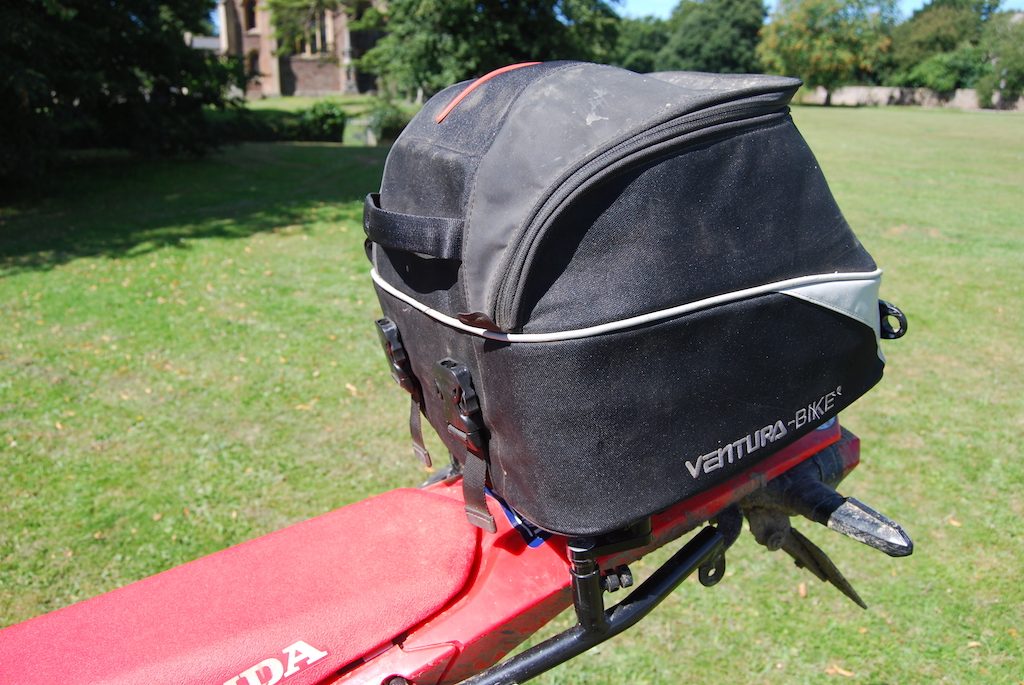
10. TAIL PACK
Whether you go for hard or soft luggage, tail packs or panniers, it’s a personal preference. I favour tail packs that keep everything central and out of the way. While you can mount them on the seat, this will restrict your movement off-road, so a bike-specific mounting rack that bolts to the subframe is a good option.
Choices for the CRF450L are limited, but I found this cracking option from New Zealand manufacturer Ventura, with a large bag that slips off at the end of the day. I added a foam pad underneath to keep out the mud.
11. ENGINE
While the stock CRF450L is quite adequate on power thanks to its great torque, dealers are now able to fit the US-spec ECU which gives a welcome hike to the ponies available. It’s a great upgrade that will have you smiling all day, so if you are buying a CRF from a dealer, get one included in the deal.
12. TOOLS
OK, so you can’t see them here, but you are going to need some tools for adjustments, repairs and general fettling on the way. Oh, and if you are carrying tubes, you will need levers, a bit of lube, a pump, and some knowledge of what you are doing.
Whatever you do, don’t keep tool bags in a rucksack on your back as this can cause serious injury in even a small off, not to mention being quite uncomfortable to ride with all day. If you wear anything on your back, then just make it a drinks bladder carrier with, at the most, soft clothing and spare gloves.
13. ABR STICKER
No self-respecting rider leaves the house with nailing their colours to the mast. ABR and proud!
PACKING FOR YOUR TET TRIP
OK, so you’ve decided on which bit of the TET you are going to ride. You’ve recruited a bunch of adventurous mates for the trip and fettled your bike to a state of almost Dakar Rally preparedness. But what about the packing? What are you going to need on the journey?
Clearly, what you need will depend on whether you want to go full adventure mode and camp every night under the stars, or treat yourself to some creature comforts and check in to a cosy B&B or pub each night, have a hot shower and a good night’s rest. Having tried both, I certainly prefer the latter option and, as a bonus, this also means you need to pack far less kit. Adventure light? Guilty as charged.
So, as a guide, here’s our packing list for a short four-day trip. It’s by no means exhaustive and you can add and subtract as much as you like depending on personal preference, and perhaps more importantly, weather forecast, but it’s a starting point.
RIDING KIT
- Adventure Jacket
- Adventure trousers
- Knee pads
- Baselayers
- Adventure boots – preferably waterproof
- Waterproof socks – for when the water goes over the boots
- Gloves – at least two pairs
- Neck tube
- Adventure/off-road helmet – road helmets can prove too hot and restrictive
- Goggles – useful in dusty conditions
- Drinks bladder rucksack
- Waterproof jacket and trousers – unless your riding kit is definitely 100% waterproof
TOOLS / HARDWEAR
OK, so toolkits are very personal, but at the very least you are going to need a basic kit with the most common size sockets, wheel spanners, screwdrivers, Allen keys, a multi-tool, as well as a plug spanner.
So, when it comes to tools, I’d also I’d recommend:
- Portable electric pump
- Inner tubes
- Tyre levers and a bit of washing up liquid/lube
- Cable ties – multiple sizes
- Gaffer tape
- Padlock and chain
- Head torch
OFF THE BIKE
While many will think it’s unnecessary to factor in something to wear in the evening if you’ve been travelling for eight hours in the saddle on mucky lanes and trails, a change to dry clothes will be a definite joy. You will also be more welcome in a pub if you don’t turn up looking like Nick Sanders’ grubby brother. At the least, I’d recommend
- Jeans/lightweight trousers
- Sweatshirt/hoody
- Spare T-shirts
- Clean underwear for each day
- Spare socks
- Sponge bag
- Phone charger
- Camera
- Sun cream – if riding in summer
- Hand gel – for cleaning on the fly
- Painkillers – to take the edge of minor aches and pains
What are you waiting for? Get out there and ride the TET as soon as you can. You won’t regret it!