How to get bright and bold and not blown and overexposed.
No matter how pricey the camera is, you’re never going to be able to capture light and colour like your eyes can. It’s easy to think that the brighter the photographic conditions are, the better your photo will be. In some cases that’s actually true. Just like having too little light, your camera can struggle to capture that magic shot if there’s too much. With the wrong setting or with your camera in the dreaded ‘auto’ mode, you’ll often just end up with a super contrasting shot.
The Overview
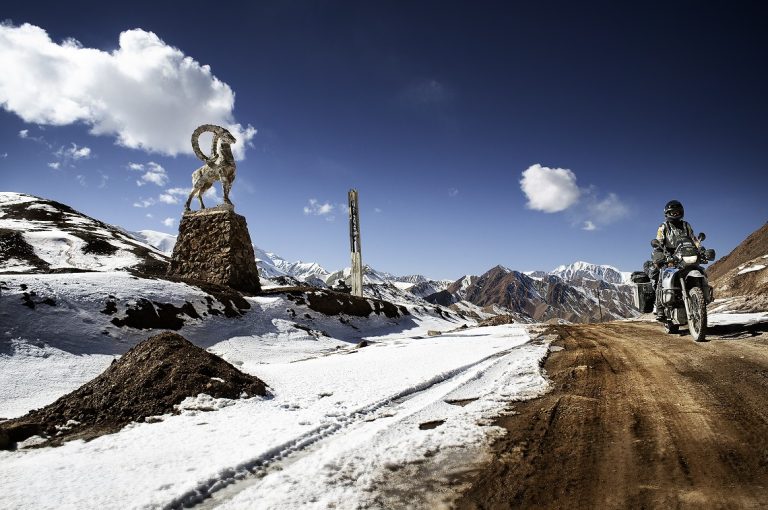
The photo in this class of Lisa cresting the Kyzyl Art Pass, along the ‘Silk Route’ in Tajikistan, is a great example of super bright conditions. To make the shot more challenging we were also at 15,000-plus feet with very little air pollutants and the entire landscape screamed contrast. The problem is at that kind of altitude everything tends to have a bluish hue.
Shot Set-Up
Like I said in the last class, we need to eliminate as much camera movement as possible. If you have a tripod, pull it out. Remember to turn your camera’s ‘vibration reduction’ off. If you’ve not got a tripod, brace yourself against something solid. We want to make sure that the rider is in focus but we also want the landscape to be sharp and have depth.
Lens Type
The shot looks great largely because of the size of the rider and the vast scale of the landscape. The goal here is to get as much of the grandeur of the scene into your camera to really make the photo look epic. If you have a wide or ultra-wide lens now’s the time to use it. Wide lenses are great at bringing more of the world into your shot; they typically also have a shallower depth of field.
Top Tip: If you know you’re going to photograph at altitude then carrying and using a U.V. filter is a great idea. Using one will reduce the bluish hue that can alter the colour of your shots. If you don’t have a filter you can always use Photoshop and add a digital warming filter.
Sharp Focus and Image Depth
You want to make sure that both the rider and the landscape are tack sharp. To make that happen we need to adjust the lens to be shooting at a higher f-stop. (Top Tip: The higher the f-stop number, the smaller the opening of the lens and greater the depth of field.)
Opening the f-stop to a smaller number will allow more light into the camera, but will decrease the depth of field, creating either a blurred foreground or background dependant upon which you choose.
Shoot at your lens’ widest possible setting. For this photo, I shot at 18mm. I knew I wanted to capture Lisa as she crested the pass and so, with the camera’s lens in ‘autofocus’, I focused the camera at the point on the ground at which I wanted to photograph Lisa.
I then pressed the shutter release halfway down to set the focus, released it and then turned the lens’s focus mode to ‘manual’, effectively locking in the focus, ensuring I wouldn’t accidentally alter it.
Camera Settings
Set your camera to ‘aperture mode’. In this mode, you decide on the aperture or f-stop setting and the camera works out how fast to fire the lens to allow enough light in to capture the image. To capture this shot I set the lens to f13. Set your camera’s white balance to ‘auto’ or ‘daylight’. If you can select how your camera ‘meters’ the light, select ‘matrix metering’ or ‘centre-weighted’.
With all the bright light we want to ensure that we don’t get blown highlights. To limit this set the exposure compensation feature found on almost all cameras. Find the ‘+/-’ icon or button and dial in a negative amount. Start with a setting of minus 1/3 of a stop.
If the image is still too bright, increase that level possibly up to 1 full stop. Effectively we’re darkening the image and controlling the highlights. If you have a colour setting use ‘neutral’.
Finally, put your camera into burst mode, remember, deleting is always free!
Top Tip: At altitude, things can get very cold. Keep a spare battery warm by putting it inside your clothes whilst riding. Cold temperatures kill batteries. For this shot, I had to reheat my dead batteries on the cylinder head of my R1150GSA. I was able to get enough heat into one to capture just five images.