

Learning the art of long exposure photography allows you to capture some magical imagery. Simon Thomas shares how to master this skill.
Long What?
Yeah, I know, you’re a motorcyclist not a photographer, but no one else knows that. Spend a few minutes with this article and you might well impress a few more of your friends with your new-found photo skills.
What Is Long Exposure Photography?
Long exposure photography is often thought of as highly complex, but with today’s snazzy and almost fool proof cameras, it really isn’t. Long exposure images can produce surreal and even supernatural effects and, done right, can produce outstanding photos.
The process is pretty straightforward once the right technique is applied, and with the right settings dialled into your camera, you’ll be impressed with the results.
LEP (Long Exposure Photography) is simply the process whereby you choose to leave the camera’s shutter open for longer than usual in order to capture elements of an image that standard fast shutter photography can’t, or to blur or haze elements like waterfalls, clouds or any other moving objects in the photo.
Why LEP?
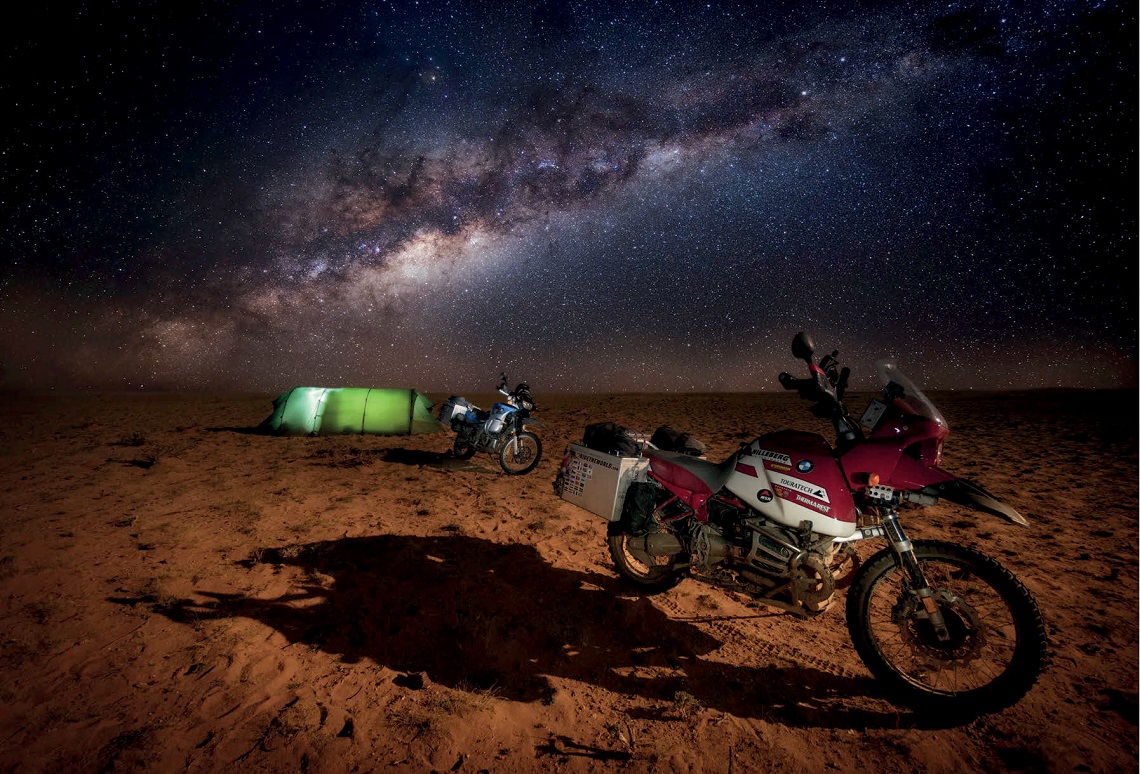
For me, LEP is a great way of sharing the atmosphere of a location. By creating an image with a blurred sky, streaky clouds, smoothed-out water or even star trails, I’m able to share how a place felt, with far more impact than with the usual point-andclick photo that just captures what I saw.
Besides, the second you choose to leave the shutter of your camera open for longer than is strictly necessary to capture the image; you have just become a photographer!
Typical Long Exposure Scenarios
- Cityscapes – Blur the sky or clouds; create trail-lights of the traffic moving through the city.
- Seascapes – Blue the water or waves to create atmosphere.
- People/Crowds – Blur the people to create a ghost-like effect. This is a great technique when photographing famous monuments, when you want to focus on the monument and not the crowds.
- Distracting Objects – Moving objects that would otherwise draw the viewers eye away from the main focus of the image. The moving objects then become blurred and draw less attention.
Getting Set Up
The first thing to realise is, if your shutter is going to be open for longer than a fraction of a second, you are going to need to keep it very still by either placing your camera on something solid or by using a tripod. Trying LEP without a tripod will just produce a mess of blur, trust me.
Set up your camera and tripod and frame your shot so that the main focus (probably your bike) is where you need it to be. Remember, anything that is moving (waterfall, sea waves, clouds or people) will be blurred and even appear transparent by the time the photo is processed.
Timing
Unless you’re carrying a ton of gear and special filters (most travellers can’t, me included) the best time of day to practice LEP is before sun up and after sun down. With less available light the shutter on your camera can stay open for longer, without producing blown highlights in your images.
Speed Of Light
Remember, the faster something is moving through your scene, the shorter the time you need to create the soft, low contrast and blurred effect. So, fast tumbling water cascading over a set of waterfalls will only need to be exposed for one to five seconds to create that artsy “fairy water” effect, as Lisa calls it.
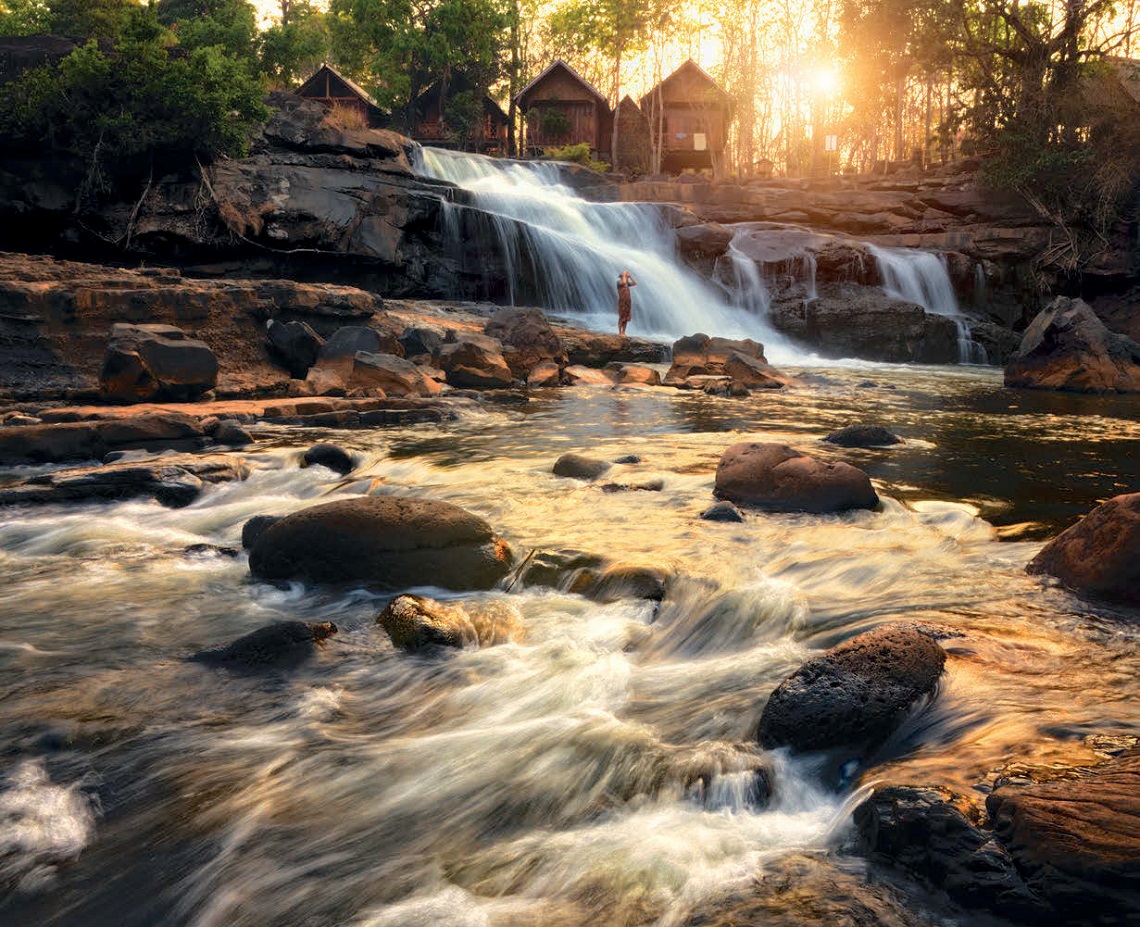
Location: Tim’s Waterfall, Laos, Asia. Copyright © Simon & Lisa Thomas – www.2ridetheworld.com
Settings
All DSLR (Digital Single Lens Reflex) cameras, and even most point and shoot models, offer several settings marked ‘A’ for aperture and ‘S’ for speed. ‘M’ normally denotes the setting for ‘full manual mode’, a setting that needs an entire tutorial to itself.
For LEP photography, go ahead and put your camera in ‘S’ mode. The next decision is to choose the length of time you want the shutter to remain open. Remember, the longer the shutter stays open, the more ethereal and blurred the effect will be on any objects moving through your scene. Start with a time of two to five seconds and then check your image after each one is captured. If you want more blur and effect, then increase the time.
Next, find the ISO button and make sure that you are shooting in the lowest ISO (sensor sensitivity setting) possible. 50-100 ISO is a great setting and is as low as most cameras will go. The low ISO will also ensure that you capture as little noise and digital artefacts (the crap no-one wants) as possible.
In ‘S’ mode, your camera will now work out all the other complicated stuff, to ensure that you capture a correctly exposed image. How cool is that? And you thought this was going to be complicated!
Now it’s time to play!
LEP is a great way to create dramatic and engaging images from even the most mundane of subjects. So, try photographing your motorcycle in front of a waterfall, or by the ocean. Try shooting from the ground upwards using LEP to create a blurred and ethereal backdrop from the sky and clouds.
You can even place your bike in a crowded area, use the LEP technique I’ve described here and watch the crowd turn into a gentle blur of motions that skirts and moves around your stationary bike. I guarantee you’ll love the results.
Have fun, and if you like what you capture, please share it to our Facebook page at www.facebook.com/2ridetheworld We’d love to see your images!
