
Julian Challis is on a mission to adventurise his Yamaha XT660Z Ténéré. This issue he’s beefing it up so that it can handle the rigours of off-roading.
After the initial modifications I made to my Ténéré in the last issue of Adventure Bike Rider, the bike now had decent footpegs to actually offer some support and grip, shorty levers handling the controls, a charging point for the SatNav, and some half decent tyres. I make a point of saying ‘half decent’ as only one of them was fit for purpose, but more on that later.
The next area of performance to address was to get the bike some protection from the demands and risks of real off-road use.
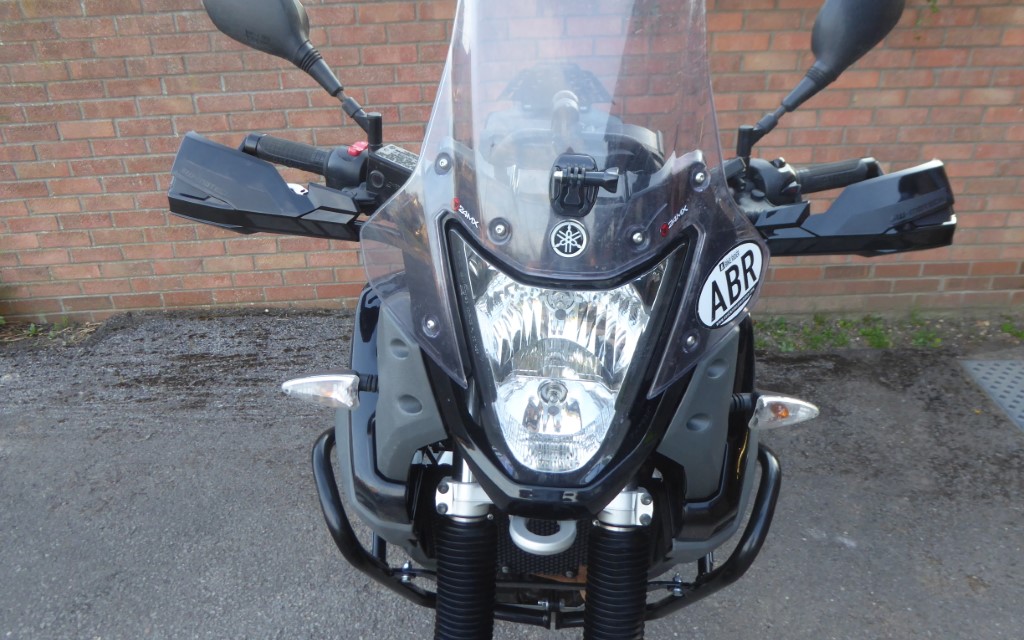
As with the majority of adventure bikes, despite the Ténéré’s obvious desert racing heritage, the standard bike has little in the way of protection. There are no engine bars or handguards and there’s no exhaust protection.
Now, this may be fine if your intention is to race around on the blacktop, but it’s pretty lame if you want to use the bike as a genuine adventure machine, taking to the dirt and tackling tricky terrain. It was time to get busy and correct Yamaha’s obvious omissions.
Thankfully, I could skip past the internet trawling and fact finding as I’d already decided that I was going to be using SW Motech parts to upgrade my Yam. I’ve used one of the company’s dry bags when travelling from Vietnam to South Africa, and I was mightily impressed with the quality and hard-wearing design. If that craftsmanship extended throughout the brand’s range, then I’d have little to worry about.
In fact, when I bought the Ténéré back in January it had come equipped with equally well-made SW Motech soft panniers and side racks, so extending the product range onto the front end of the bike made even more sense.
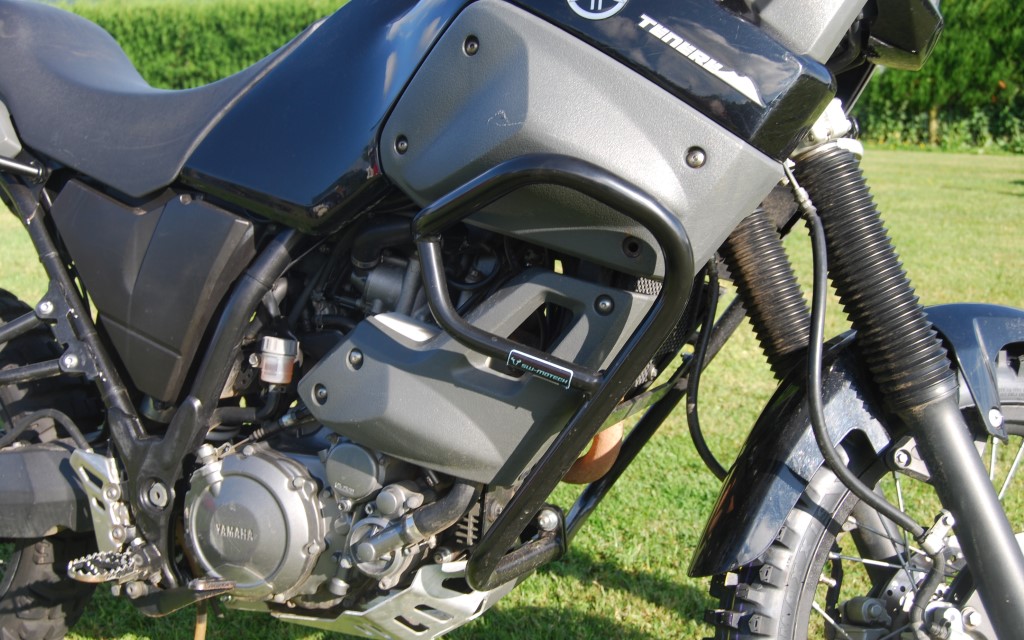
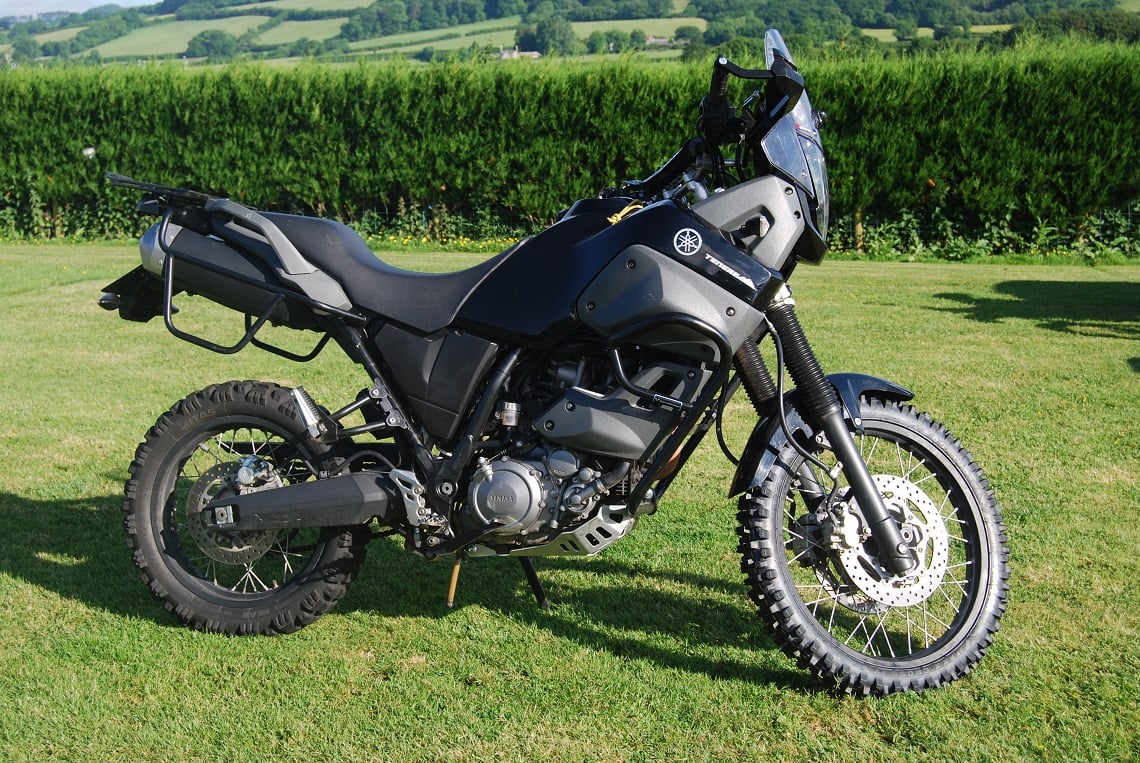
A quick check on www.sw-motech.com revealed a staggering array of kit for the Yamaha, and I could easily spend thousands on the bike within seconds. Alas, as I’m trying to keep this project in the bounds of sensible and necessary upgrades, I kept to my plan: An alloy sump guard, a decent set of crash bars, and a set of wraparound handguards was all I needed, and SW Motech could oblige.
After a few days of ordering, a pleasingly large box arrived and was ripped open within seconds (who doesn’t like a parcel? OK maybe former Russian spies aren’t so keen, but that’s best left). It was nice to discover that the SW Motech kits are pretty comprehensive, with all required components and fasteners included along with a clear parts list and a pictorial guide to fitting.
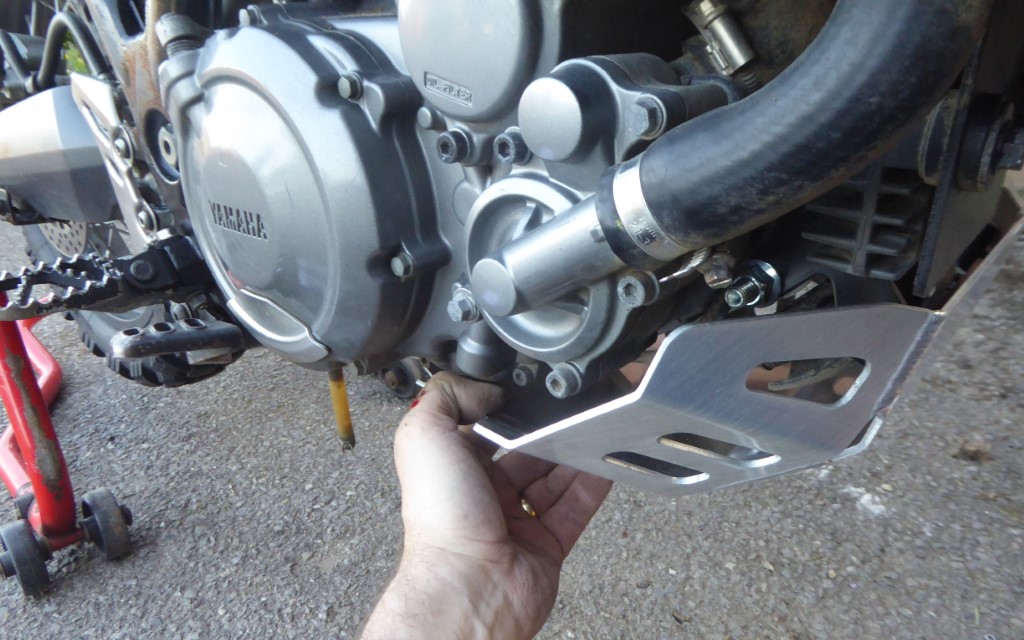
First off, I decided I’d get to installing the sump guard. With the twist of four bolts I was delighted to be binning the stock Yamaha item for the shiny alloy guard I had just unwrapped. Fitting was simple, but I used a combination of Copaslip and thread seal as sump guard bolts have two annoying habits: either they rattle out or they seize in place.
The new guard came with a new front bracket and spacers depending whether you were fitting the crash bars.
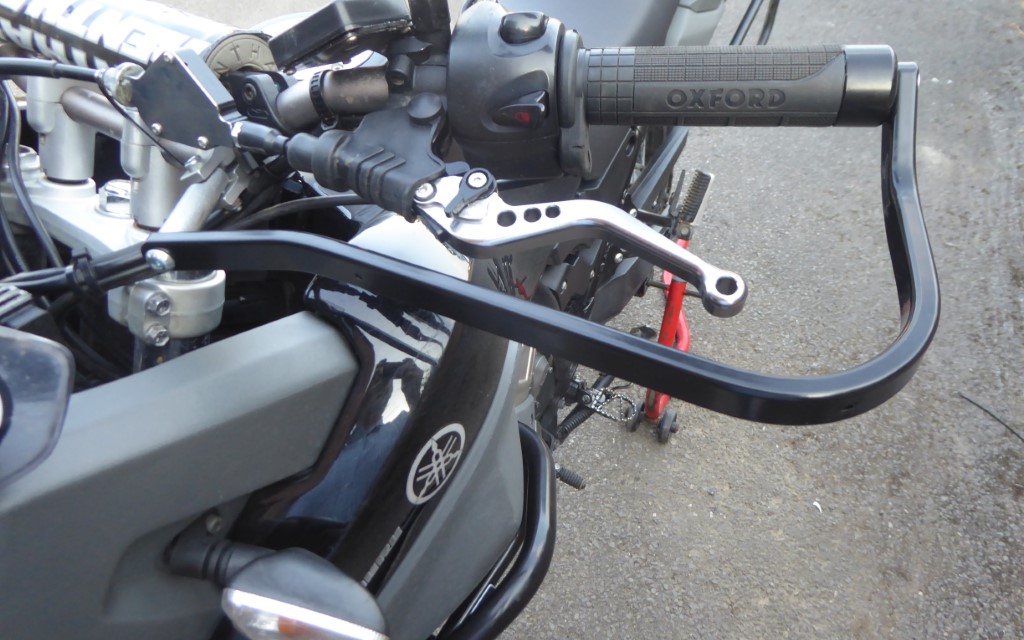
Returning to the garage a few days later it was time to tackle the crash bars and handguards.
I had to backtrack a bit to fit the bottom mount as it picked up on the same bolts as the sump guard.
Although the instruction sheets included were clear enough, the images assumed that I knew what I was doing, and they didn’t give many tips as to what to remove or move to make your life, and the fitting, a bit easier.
So, to help others, I suggest that you remove the rectifier to make access to the bottom mount simpler and be really careful not to cross thread the nut.
With the bottom mount in place, the uppers were a tad easier to secure once the stock grey bash guards were whipped off and the OEM tank bolts (long allen bolts that protrude to the outside of the tank) removed.
Once the top points are in place, the bars were bolted together onto the bottom mount and then bound by a cross brace which secures the top of the bars together.
With everything located, all the bolts were tightened in sequence and the stock plastic replaced to finish the job. My beefed up Ténéré was starting to take shape.
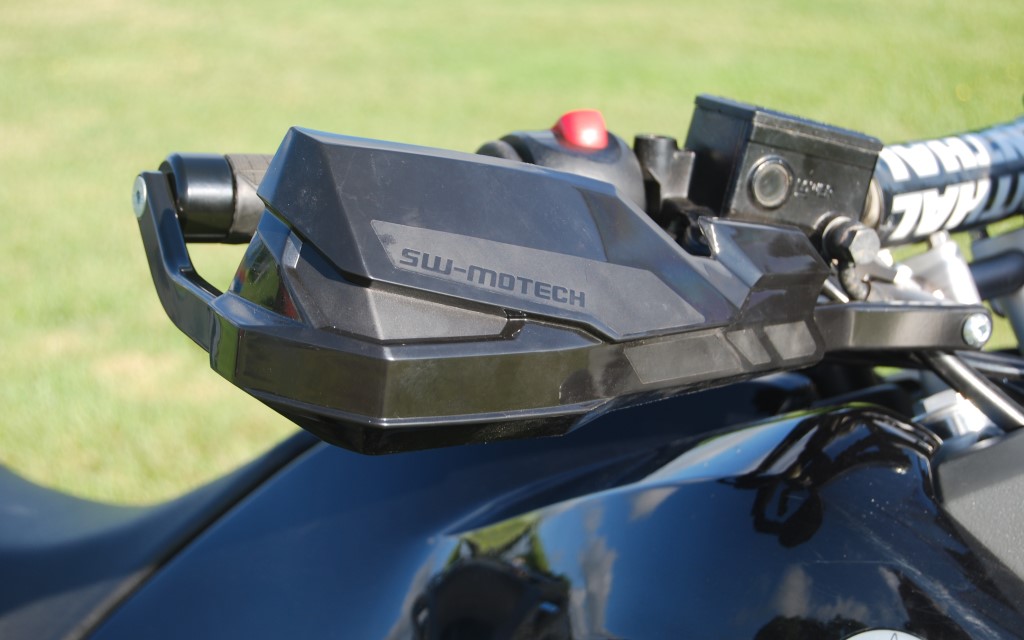
Next to fit were the handguards, and again the quality of fit was impressive. From the flexible mounts that go onto the middle of the braced bars, to the milled attachment points that screw into the end of the bars, the bar weights that sit next to the bar ends to the thick alloy bar that curves round the levers.
Once everything was located and good to go, the bolts were nipped up and the final plastic guards screwed into place. The whole process took no more than 10 minutes from start to finish.
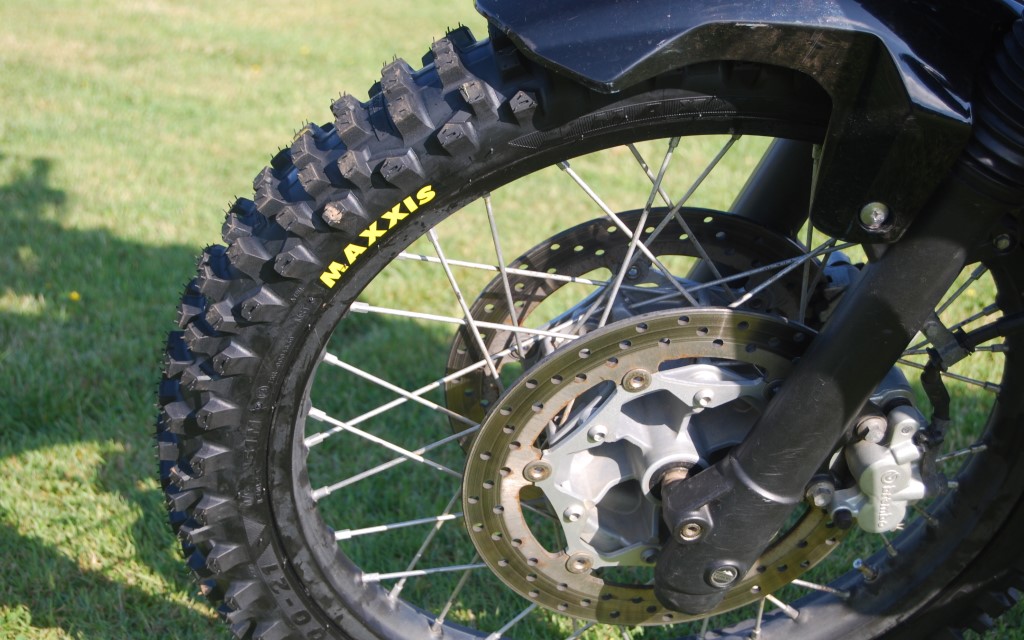
With the heavy lifting of bike protection done, it was time to address the dirt-averse Mitas E07 on the front wheel. For off-road grip, the tyre was simply not sufficient and, although I was looking at a dirt focussed dual-sport option, I really wanted to see how the bike would handle a far more off-road option.
Classic Enduro in Bristol came up with the goods again, and Ian swiftly fitted a Maxxis Macros IT onto a loose wheel.
Actually, while I’m on the subject of tyre fitting, I didn’t mention that I’m also running Bike-Seal in both front and rear tubes.
For those who are not familiar with this product, it’s basically Kevlar in solution which instantly plugs any holes up to a staggering 15mm and, as it’s the only puncture protection system that has been both tested and endorsed by MIRA and it costs just £28 to do both wheels, using it was a no-brainer.
After 500 miles on the Trans European Trail already, I’m pretty happy with the protection and peace of mind it’s offering.
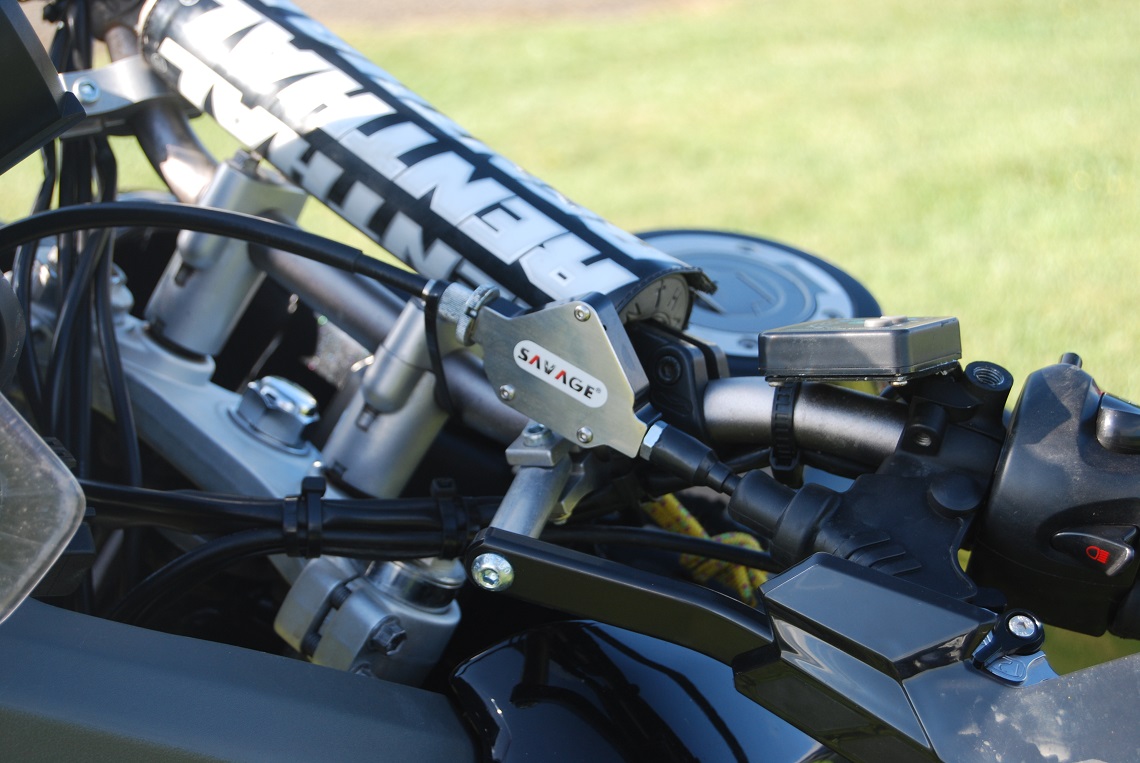
The final addition to the bike for this issue also happens to be the best bargain. I’d seen a post on a Ténéré Facebook group about a neat, easy-pull clutch unit, and for a meagre £9.50 on eBay in whichever colour I fancied, it was another ‘brain not required’ decision.
Opting for Henry Ford black, the neatly manufactured unit arrived a week or so later complete with a choice of two additional cables that go between the clutch perch and the unit, with the standard cable mounting from the other side.
It’s a beautifully simple little lever system that uses the basic principle of mechanical advantage – the clutch cable comes into the bottom of the internal lever, but the clutch lever-operated cable attaches to the top, thus adding leverage to the clutch pull and making it far smoother.
Almost against the odds given the price, it works staggeringly well. The Ténéré’s previously stiff cable operated clutch now feels like a KTM hydraulic unit, smooth yet positive and really easy to operate all day without any hand fatigue. You can’t expect much more for under a tenner.
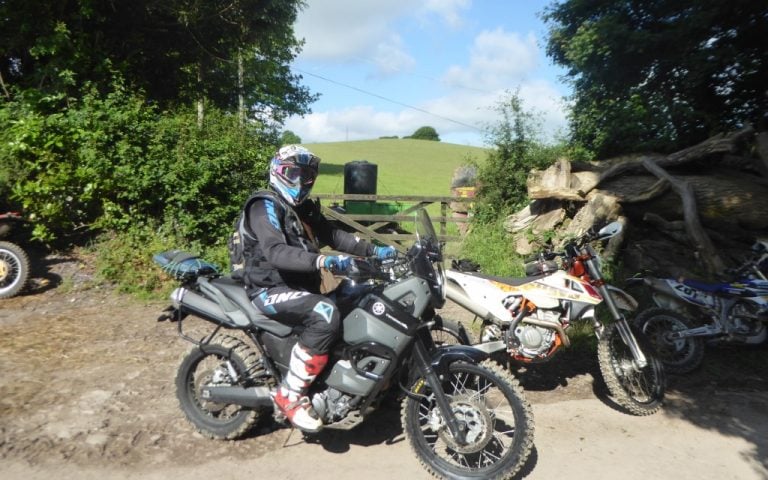
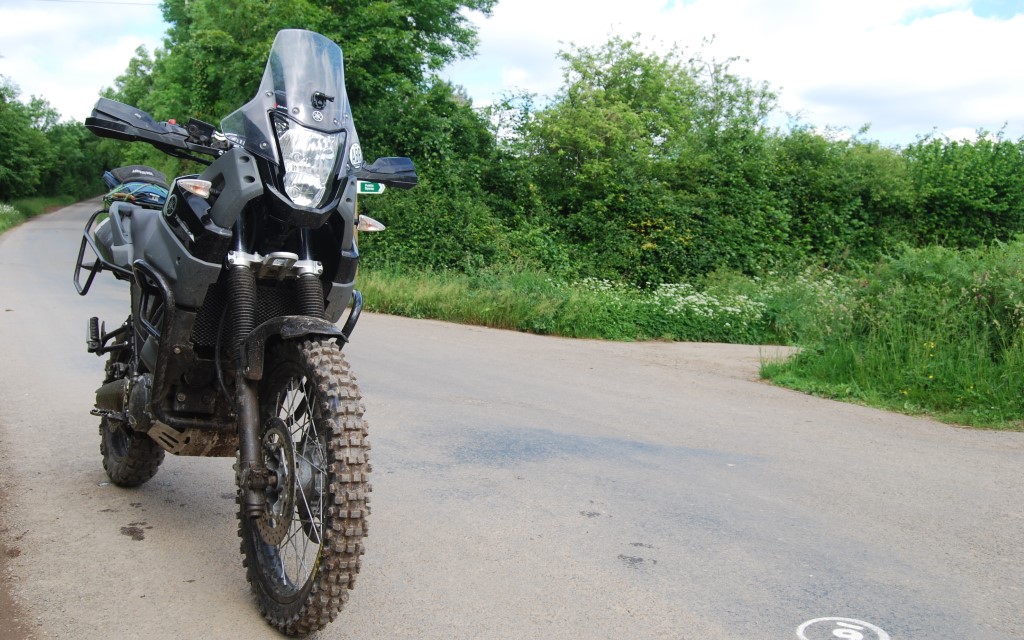
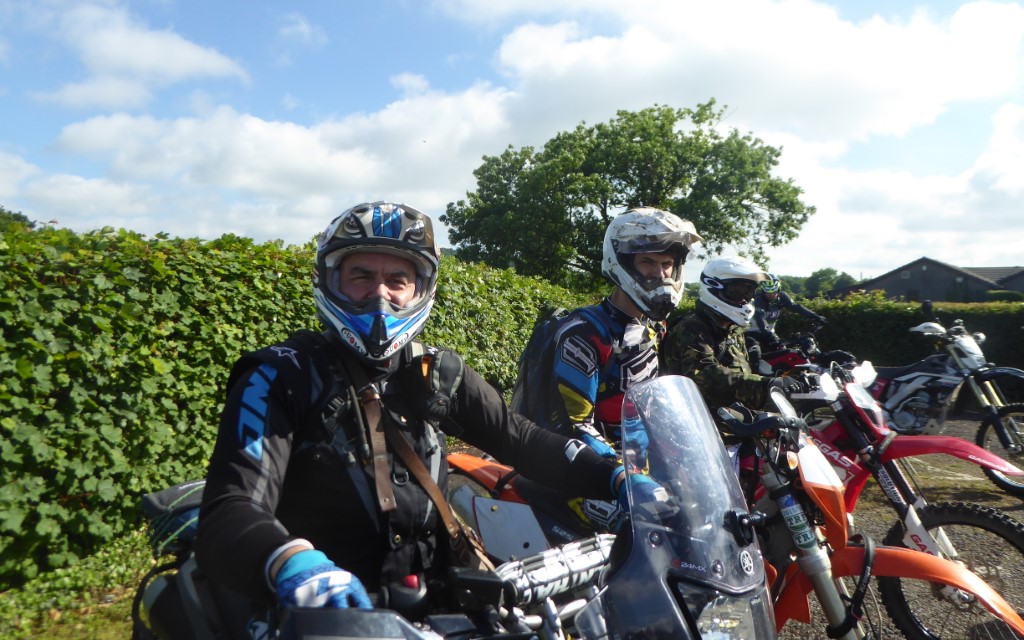
With all the bits in place, the bike got an unexpected outing down to Devon for part of the Bristol TRF’s summer weekender. The trails tackled showed both the bike’s abilities and limitations in pretty much equal measure.
The new Maxxis front tyre transformed the front end from the previously vague feeling into pin-point accurate steering and fantastic grip, even with the weight of the Ten (roughly 206kg). The rear needed dropping down on pressure a tad to offer similar confidence and grip but, once there, it was plenty good enough for summer time trails, though in wetter places a similar enduro rear to match the front would have helped.
The increased confidence in both the tyres and the bike had a downside. As I found myself attempting trails that were hard for my mates on enduro machines, let alone over 200kg of adventure bike, and regretting it.
The bike is, for me, too heavy for difficult terrain, and when it goes down it goes down hard. There is no way that one person alone, unless they possessed the strength of Eddie Hall, can pick up a Ténéré when it’s lying down on a rocky Devon hill. On the plus side, I can confirm that the engine and handguards on both sides work extremely well, but on the minus side I can also confirm that my shoulder now doesn’t.
Next issue I’ll be out of the sling, back on hopefully safer terrain and the transmission and brakes are on the to-do list.
The modifications so far
Julian is adventurising his Tenere as part of a series in ABR and so far these are the mods that he has made:
- SW Motech Kobra Hand Protector Kit: £126.95
- SW Motech Engine guard: £136.95
- SW Motech Crash bars: £169.95
- Dakar Saddlebag set: £319.95
- Mitas E09 Rear tyre – 130 80 17: £65
- Mitas E09 Front tyre – 90 90 21: £49
- Maxxis Maxx Cross IT Front tyre – 90 90 21: £30
- USB Port: £9.87
- Shorty levers: £14.78
- Easy Pull Clutch Unit: £9.89
- Ram Mount – FOC in garage
- Lust Racing Lowering Kit: £59.90
- Total spent: £992.24