After a serious motorcycle accident left him unable to ride for a few years, Craig Niven decided he needed a hobby that still allowed him to be involved with bikes. So, he headed to his shed and set about creating and painting custom motorcycle helmet designs.
This time last year I was involved in a serious bike accident that stopped me riding for a long time. In that time, I was desperate for a hobby that involved my love of biking which I could do while sitting down. I had recently purchased a new Arai helmet and I was uninspired by the designs on the market at the time, and when I finally found one I liked, it was unavailable in my size! So, I decided to buy a plain black helmet and paint it myself.
I know a lot of people will be horrified by this, as old school riders will have had it drilled into them that you categorically can’t paint your own helmets. This is not true with modern-day lids that are made from fibreglass or carbon fibre, as these are already painted, you just need to make sure you cover all the vents properly to stop chemicals from the paint and clear coat getting on the polystyrene padding.
I started watching videos online about helmet design and helmet painting, bought a cheap airbrush and HVLP (high volume low pressure) spray gun from eBay (delivered from China for less than £20 each), and I bought a vinyl cutter from hobby craft for £165 using a new membership promotion code. My intention for my new paint job was to basically copy a Red Bull design that Mavrick Vinales had on a motocross helmet. I used that to learn how to do designs on Photoshop, so I could see how they looked and try to work out what order to paint it in.
I’d decided to use my Touratech helmet that I’d crashed in to practice painting. I wanted all my mistakes to be here and not on a £400 lid! That was my first real mistake. Using a scrap helmet meant I didn’t aim for perfection. Any mistakes were just sanded out crudely and it was always rushed, partly because I had no intention of ever wearing it again and partly because the pain from a broken back meant I could only sit in the shed for about ten minutes a day, and five of them were spent setting up and clearing away.
The first attempt
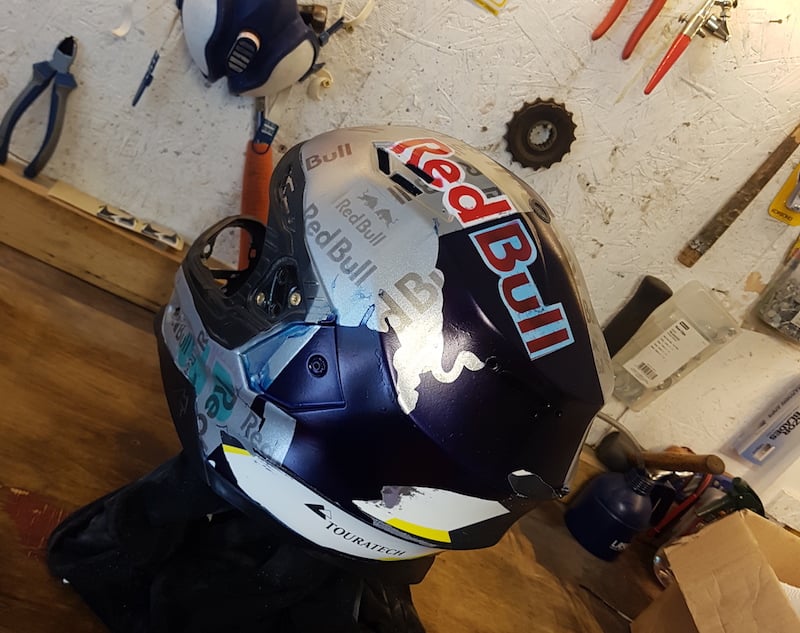
This resulted in a seriously horrible helmet with different bits of design all over the place, paint runs and chemical reactions. I was left feeling deflated and seriously questioning myself as to why I’d ever imagined I would be able to do this in the first place. I’d locked my shed door for the last time and decided to focus on my physical recovery for a few months. Some time passed and my physical health was getting better with each passing day. I could now sit up unaided for much longer periods and I started thinking about helmet painting again.
This time, I planned to ignore the practice helmet and try to paint my trials riding helmet. This would force me to correct faults as they arose, and the faults that I couldn’t correct would teach me what not to do in the future. I didn’t do any Photoshop as I planned to just take from the Mavrick scheme and adapt it to fit the smaller trials shape.
So, that was it. I headed to the shed and started masking it all off. I would rather remove all the linings and trim, but cheap helmets don’t allow you that luxury, I’d watched videos of a professional painter that does helmets for pro racers that didn’t remove any linings, so I didn’t feel pressured to rip it to bits. I just took extra time to mask it all off properly, ensuring that all vent holes were totally blocked. I started to scuff up the clear coat using Scotch-Brite Pads to give the new paint something to grip to, and I painted an undercoat layer.
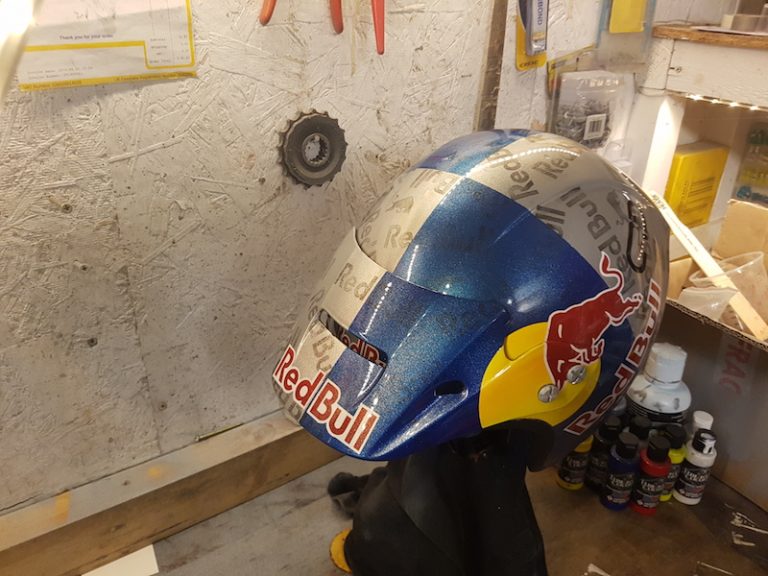
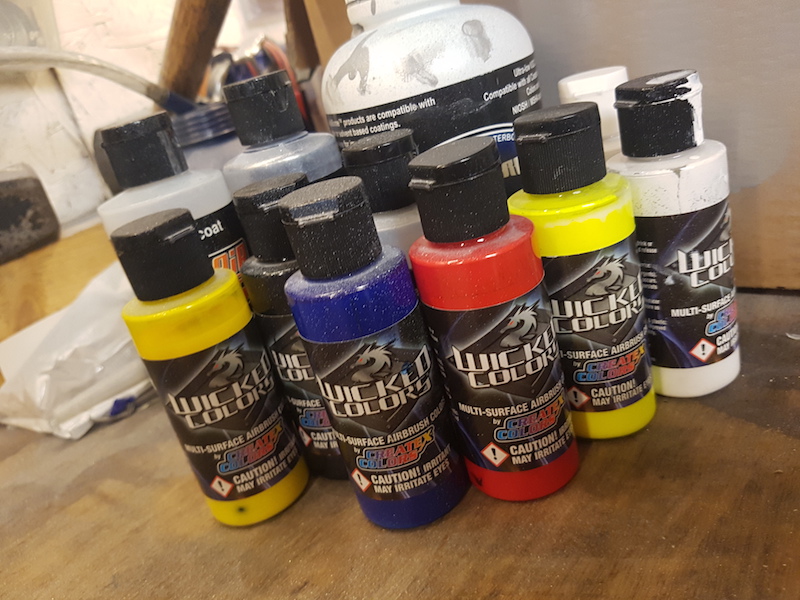
This isn’t really needed on a plain helmet but this one had a design, so I used a metallic grey base to make the whole thing uniform in colour. I then sprayed over that with a silver metallic flake paint. The paints I used were Createx Wicked airbrush colours. They come in tiny bottles but they go a long way when sprayed through the airbrush.
I measured the distances between set parts of the helmet to get the lines central and symmetrical then I mixed a metallic blue paint and painted the main helmet. This was a mistake as I forgot to paint the peak before I disposed of the remaining blue paint, so I had to wing it a bit to try and mix the same shade of blue for the peak. Of course, it’s not perfectly the same, but it ended up close enough for me to be happy with it.
I cut out about 40 small Red Bull logos and placed them around the helmet randomly. This was my next mistake, I’d decided to paint them as a shadowed background but I didn’t think forward enough and I sprayed them as an internal stencil. This meant I needed to mask all the gaps between each one.
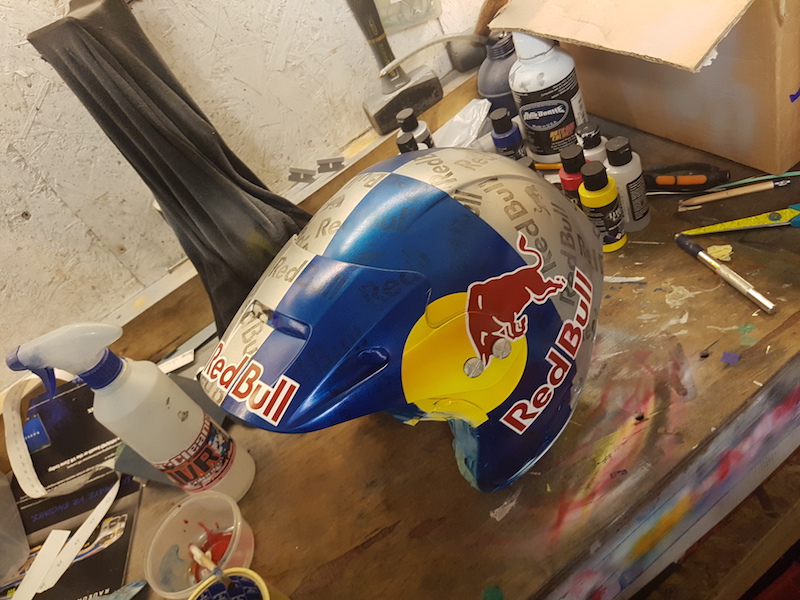
To make this faster I put tape over them all and carefully cut around them. This was extremely time consuming and hard to do, it also marked the fresh paint below. This is the mistake that annoyed me the most, but after clear coating, it wasn’t as serious as I’d thought. After removing all the masking tape, I realised I’d gone too heavy with the paint and the logos were darker than I planned, so I rubbed them all back with a Scotch-Brite Pad with the intention of starting again. As I did, I realised that I quite liked the eroded effect it created!
Doing the main Red Bull logo is tricky as it involves using two stencils. One for the main white colour, and then I needed to line up the next one exactly with the first shape. I learnt as I went on to slightly ruff up the paint before sticking the stencil down, this, combined with firmly rubbing them around the edges, really helps prevent paint from creeping under the stencil.
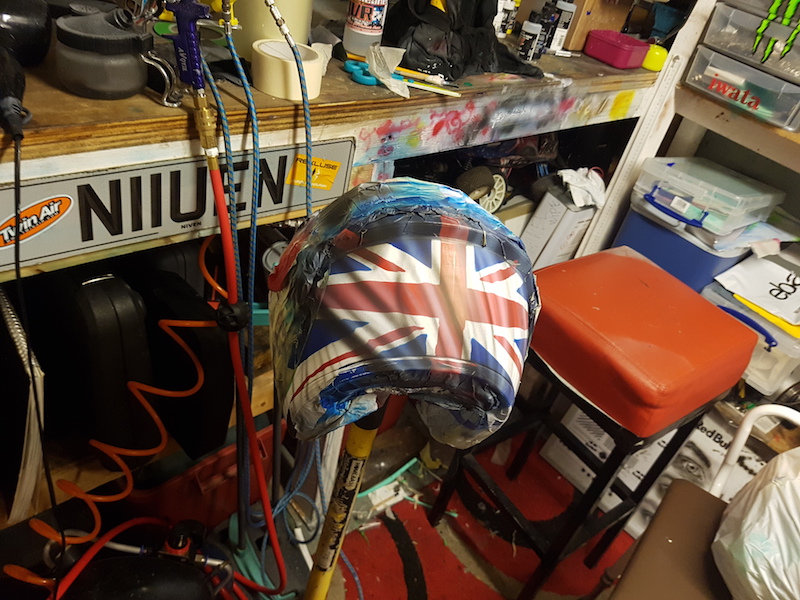
I decided to do the flag on a whim as I’d followed the lines of the helmet with white and it just felt too imposing on the whole helmet. The flag caused me a few problems as I never felt happy with it and I rubbed it out totally three times before finally getting it to a point where it would do.
I decided to design myself a signature for the back to make it totally personal to me, so I loaded up Photoshop and started playing with ideas. I finally ended up with my name and my dogs, and I was over the moon with it.
Painting it onto the flag really set it off and hid the flag that I wasn’t entirely happy with. It was slightly too big really, and I will make it a little smaller for my next helmet.
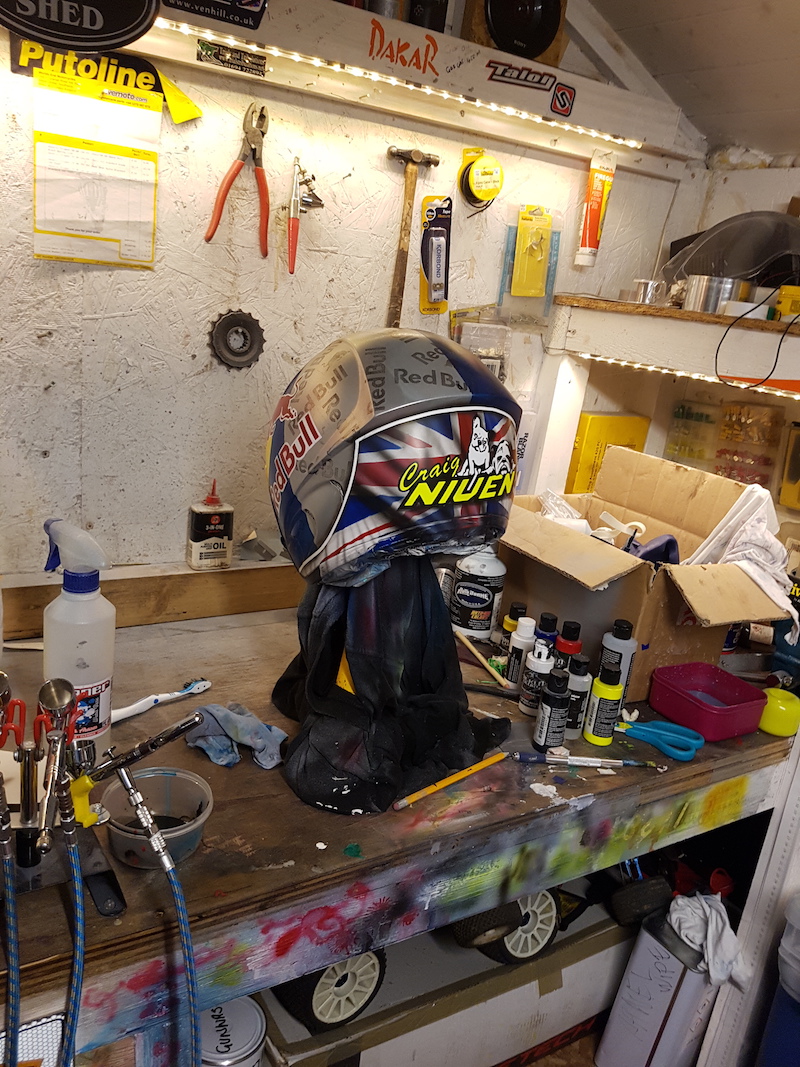
Finally, it was time for clear coat, this was two-pack lacquer for durability, so I had to spray this outside the shed as its pretty strong stuff – even mixing it was making my eyes water! To help with this, a friend came around to teach me how to mix it, and he also set up my new spray gun for me and gave me some pointers about technique and coverage. It’s a very fine line with clear coat between not enough and a massive runny mess. Thankfully, with the right set-up and a little guidance, it went on perfectly and I’m over the moon with my first ever crack at painting a helmet.
I’ve learnt a lot doing this, and I still have a lot to learn, but I’m really looking forward to my next helmet project now.
To stay up to date with Craig’s helmet painting and to check out any new designs that he comes up with, like him on Facebook.