


ABR’s green lane expert, Mike Beddows, explains how to plan a route and create a GPX file for your next green lane rideout
In issue 45 we explained how to find legal green lanes in the UK, so you all now have the knowledge of how to find them. But, what next? You could simply go and ride, but in this issue we extend this knowledge and explain how to formulate a route and create a GPX file that can be uploaded onto a SatNav.
Maps
You can buy Ordnance Survey maps, and this is what I did many years ago when I started trail riding, but as the rides became longer, the number of OS maps I was required to carry became greater.
The additional problem of how to attach the maps to the bike so I could ride without having to stop all the time was always an issue. I used to have a tank bag that I attached Velcro strips to. I then purchased a waterproof map cover (hikers hang them around their necks so they can navigate with an accessible map).
I attached the coupling Velcro strips, and voila, a cheap homemade way of sticking a map in a waterproof cover to a tank bag. But there were several flaws with this technique.
Occasionally, the wind would rip the map from its bindings causing it to flap around, but the biggest issue was once I had reached the edge of the displayed map (and this was magnified with 1:25k maps) I had to stop, get the map out and find the next part of the map to display.
Not a problem in the dry, but in the wet the maps soon got tatty. All in all, not the best solution. This all changed when I purchased a SatNav.
SatNav
After much research, I decided the best SatNav to suit my trail riding needs was a Garmin Montana (there are other suitable navigation systems, but before jumping and buying take a look at what people have next time you are out.
The Garmin is certainly popular). The Montana isn’t specifically a motorbike SatNav, instead being a hiking navigation system, but due to its ability to hold OS maps, and because it’s so rugged, it does suit the requirements very well. There are various versions of the Montana and for the most part they do the same thing, albeit with slightly different features.
The latest model is the 680t, and without beating around the bush, I can say it’s quite a wedge of cash to part with at £569.99. This may be out of reach of some ABRs, so it’s worth having a look for an older model; the 600, 610 and 650 all do the job just as well.
Second hand, these earlier devices can be found for a couple hundred pounds, making them a great alternative to the latest model (for reference I use a 650 which I bought a few years ago).
Unfortunately, simply buying the Montana is not enough. You will also want to invest in the handlebar mount and amps, which are required if you want to charge your device whilst you ride (you can use the Montana with AA batteries, but it does come with a rechargeable battery as standard so it would be a shame not to utilise this feature). Expect to pay £30-40 for the mount and amps. I class these as essential for trail riding.
Now I have the Montana and have invested in the mount and charging extras, it’s time to ride, right? Unfortunately not.
Although the Montana comes loaded with basic UK mapping it does not suffice for trail riding. You could upload a GPX, go and simply follow the line. The standard mapping will not show the trails, so you could risk it knowing there will be a drawn line to follow.
However, I’d recommend investing in OS maps for the Montana. Unfortunately, these do not come cheap either. For £149.99 you can purchase the Topo Great Britain Pro 1:50k, which gives detail to 1:50k maps and this is ideal for trail riding. But for the more ‘flush’ out there, there is the OS Maps extra Topo Great Britain Pro – GB Full (which includes 1:25k 1:50k and 1:250k). At £349.99, this is an expensive option.
Both sets of maps are not exactly cheap, but if you think along the lines how much it would cost you to purchase all the 1:50k (or 1:25k) maps of the UK, the electronic versions soon seem extremely reasonable.
GPX EDITOR
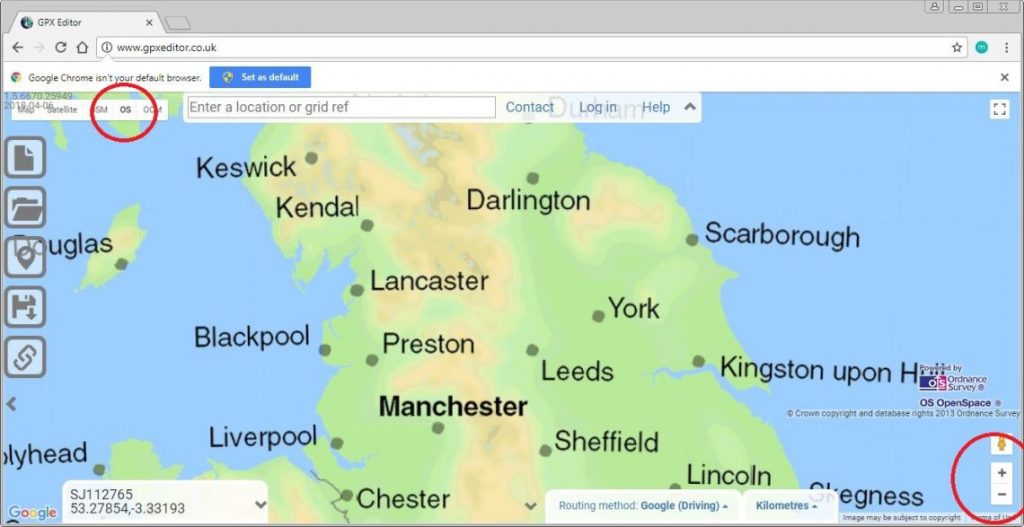
We touched on this fantastic tool in the last issue of ABR. GPX Editor (www.GPXEditor.co.uk) is a fantastic free website that allows you to view and create new GPX files. I’ve used a few online tools to view and create GPX files, but nothing comes close to the simplicity of this site.
It really is easy to use. In this example, I show how to create a route along a byway that links to an ORPA (other route with public access), and then a road section back to the start. You can make the route as long or as short as you like. Once complete, you can download to your PC for future use or to upload to your SatNav (for the Garmin Montana you can use the Gamin Basecamp program to upload to your device).
1 – When the site opens you are presented with a few map choices. For trail planning you will need to select the OS map and then zoom in to the area you are interested in.
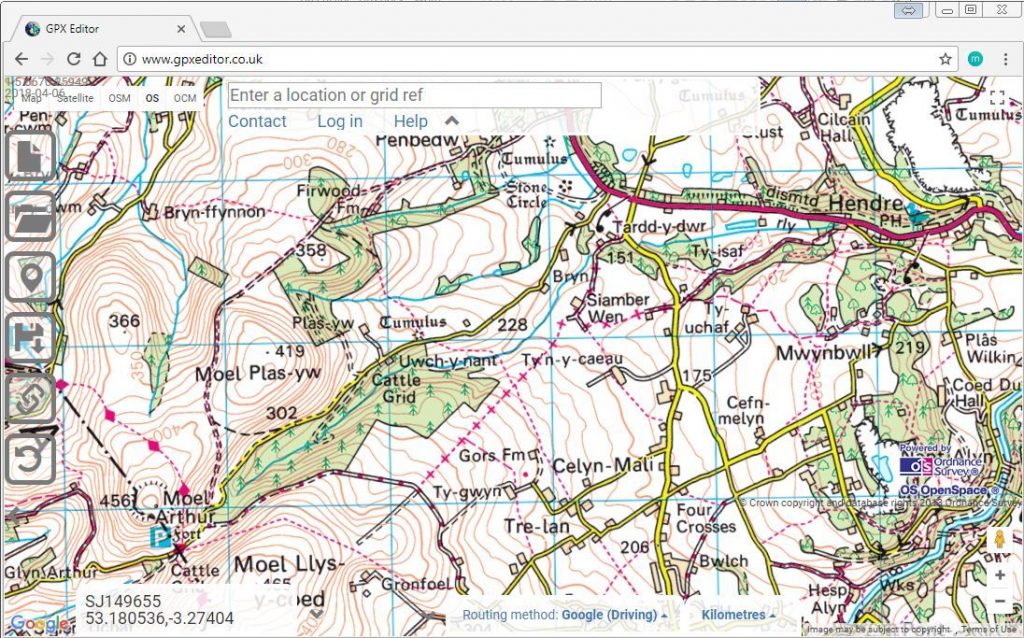
2 – Zoom in on the area and locate the trails. GPX Editor shows an OS map in 1:50k scale. This is adequate for showing byways and ORPAs.
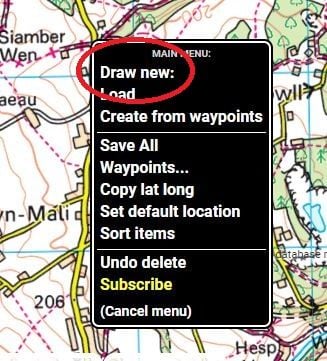
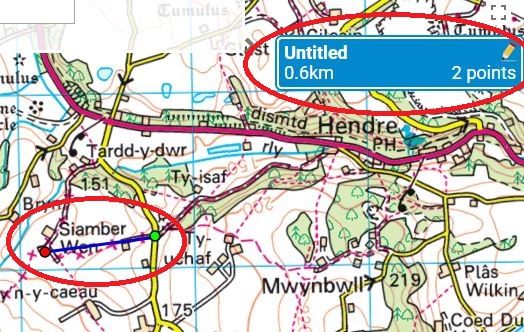
3 – Right click on the map and a pop up menu appears. Select ‘draw new’. A further menu appears with ‘route’ or ‘track’. Select ‘track’.
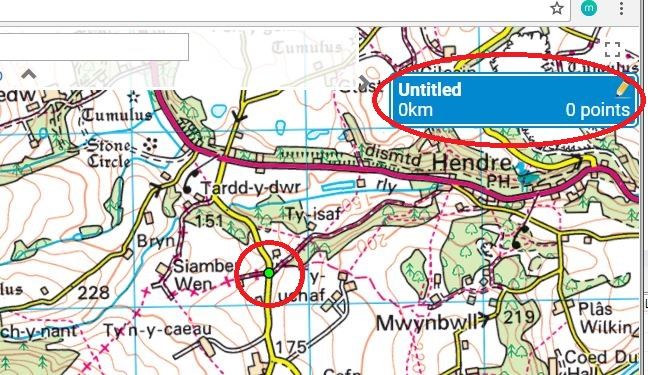
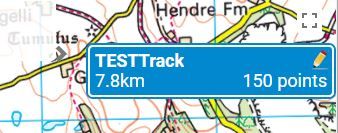
4 – Now left click where you would like your track to start. On this image, the start is shown as a green dot. In the top right, information about the track is shown. At present it is 0km, has 0 points and is called ‘Untitled’.
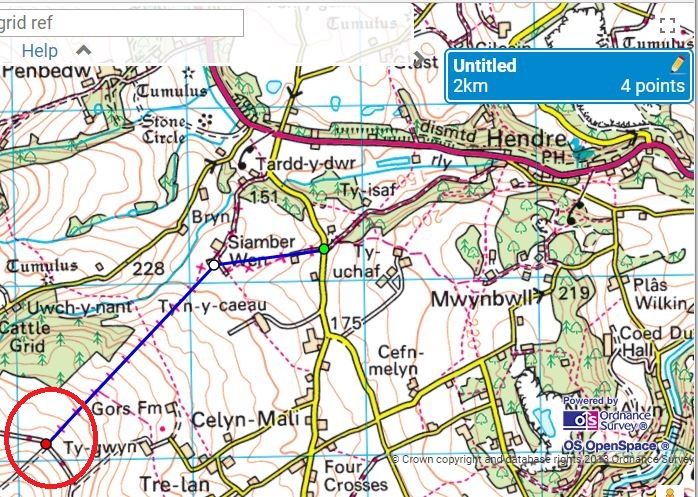
5 – Road sections can be mapped accurately, but normal off-road routing is limited to straight lines. Next, you need to right click and select ‘route to here’ and in the further popup select ‘as crow flies’. This will draw a straight line as per the diagram.
6 – Continue drawing ‘straight’ lines to form a route.
7 – On ORPAs, the software can handle direct mapping. This means the route will be exactly the same as the actual route on the map.
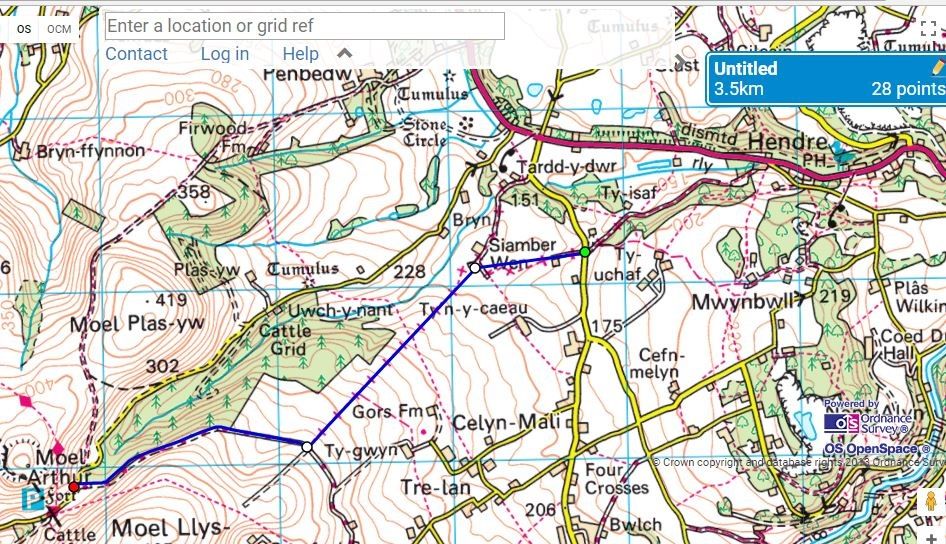
8 – To finalise this simple route, I have left clicked near the start. The route now follows the most direct road route back to the start.
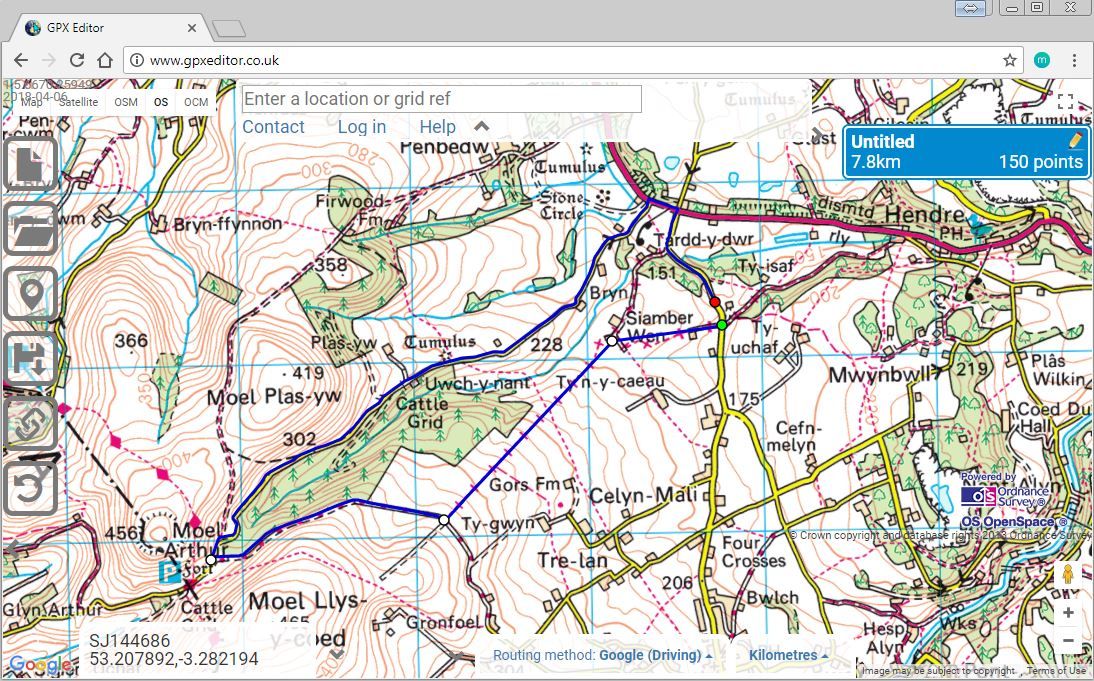
9 – To rename the track, right click and select ‘this track’. Select ‘edit’. Select ‘rename’. Now call it what you wish.
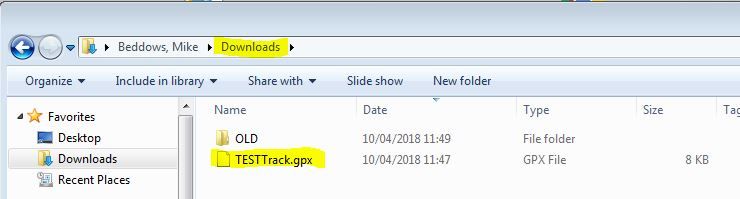
10 – To save, right click and select ‘save all’. This will download the GPX track to your computer. You will find the track in your downloads folder.
The next step is to upload this GPX file to your navigation system. In the case of my Montana, I use Basecamp to achieve this. Depending on your device, this may vary.
Common Sense
So, you’ve found the tracks, managed to create a GPX file and have uploaded it to your SatNav. Now it’s time to ride. If you are venturing off tarmac, there’s a few common sense rules to go by. I class these as common sense, but I have built these up through years of self-learning riding legal trails.
- Try and ride with someone else if possible. It’s always more fun when you’re not alone, and it reduces your risk enormously.
- If riding alone, try and tell someone where you are heading and when you may be back.
- If in doubt, park the bike and walk the track first.
- If crossing water, walk or probe the route first to gauge the depth.
- Slow down for pedestrians, and come to a complete stop for horses in plenty of time.
- Stick to the TRF’s recommended speeds (max 20mph). It’s not a race on the trails.
- Always wear the right protective gear.
- Always try and carry a mobile phone on your person, not in a bag on the bike. You may get separated from your bike and might not be able to get to it.
- Take plenty of hydration, and possibly some emergency food.
- Take tools/spares, but make sure you know how to do basic bike repairs (e.g. Punctures).
- Have a backup roadside recovery number.
- Carry a tow rope. It’s useful even if you’re riding solo, as you can use it to drag your bike out of trouble.
